Email templates
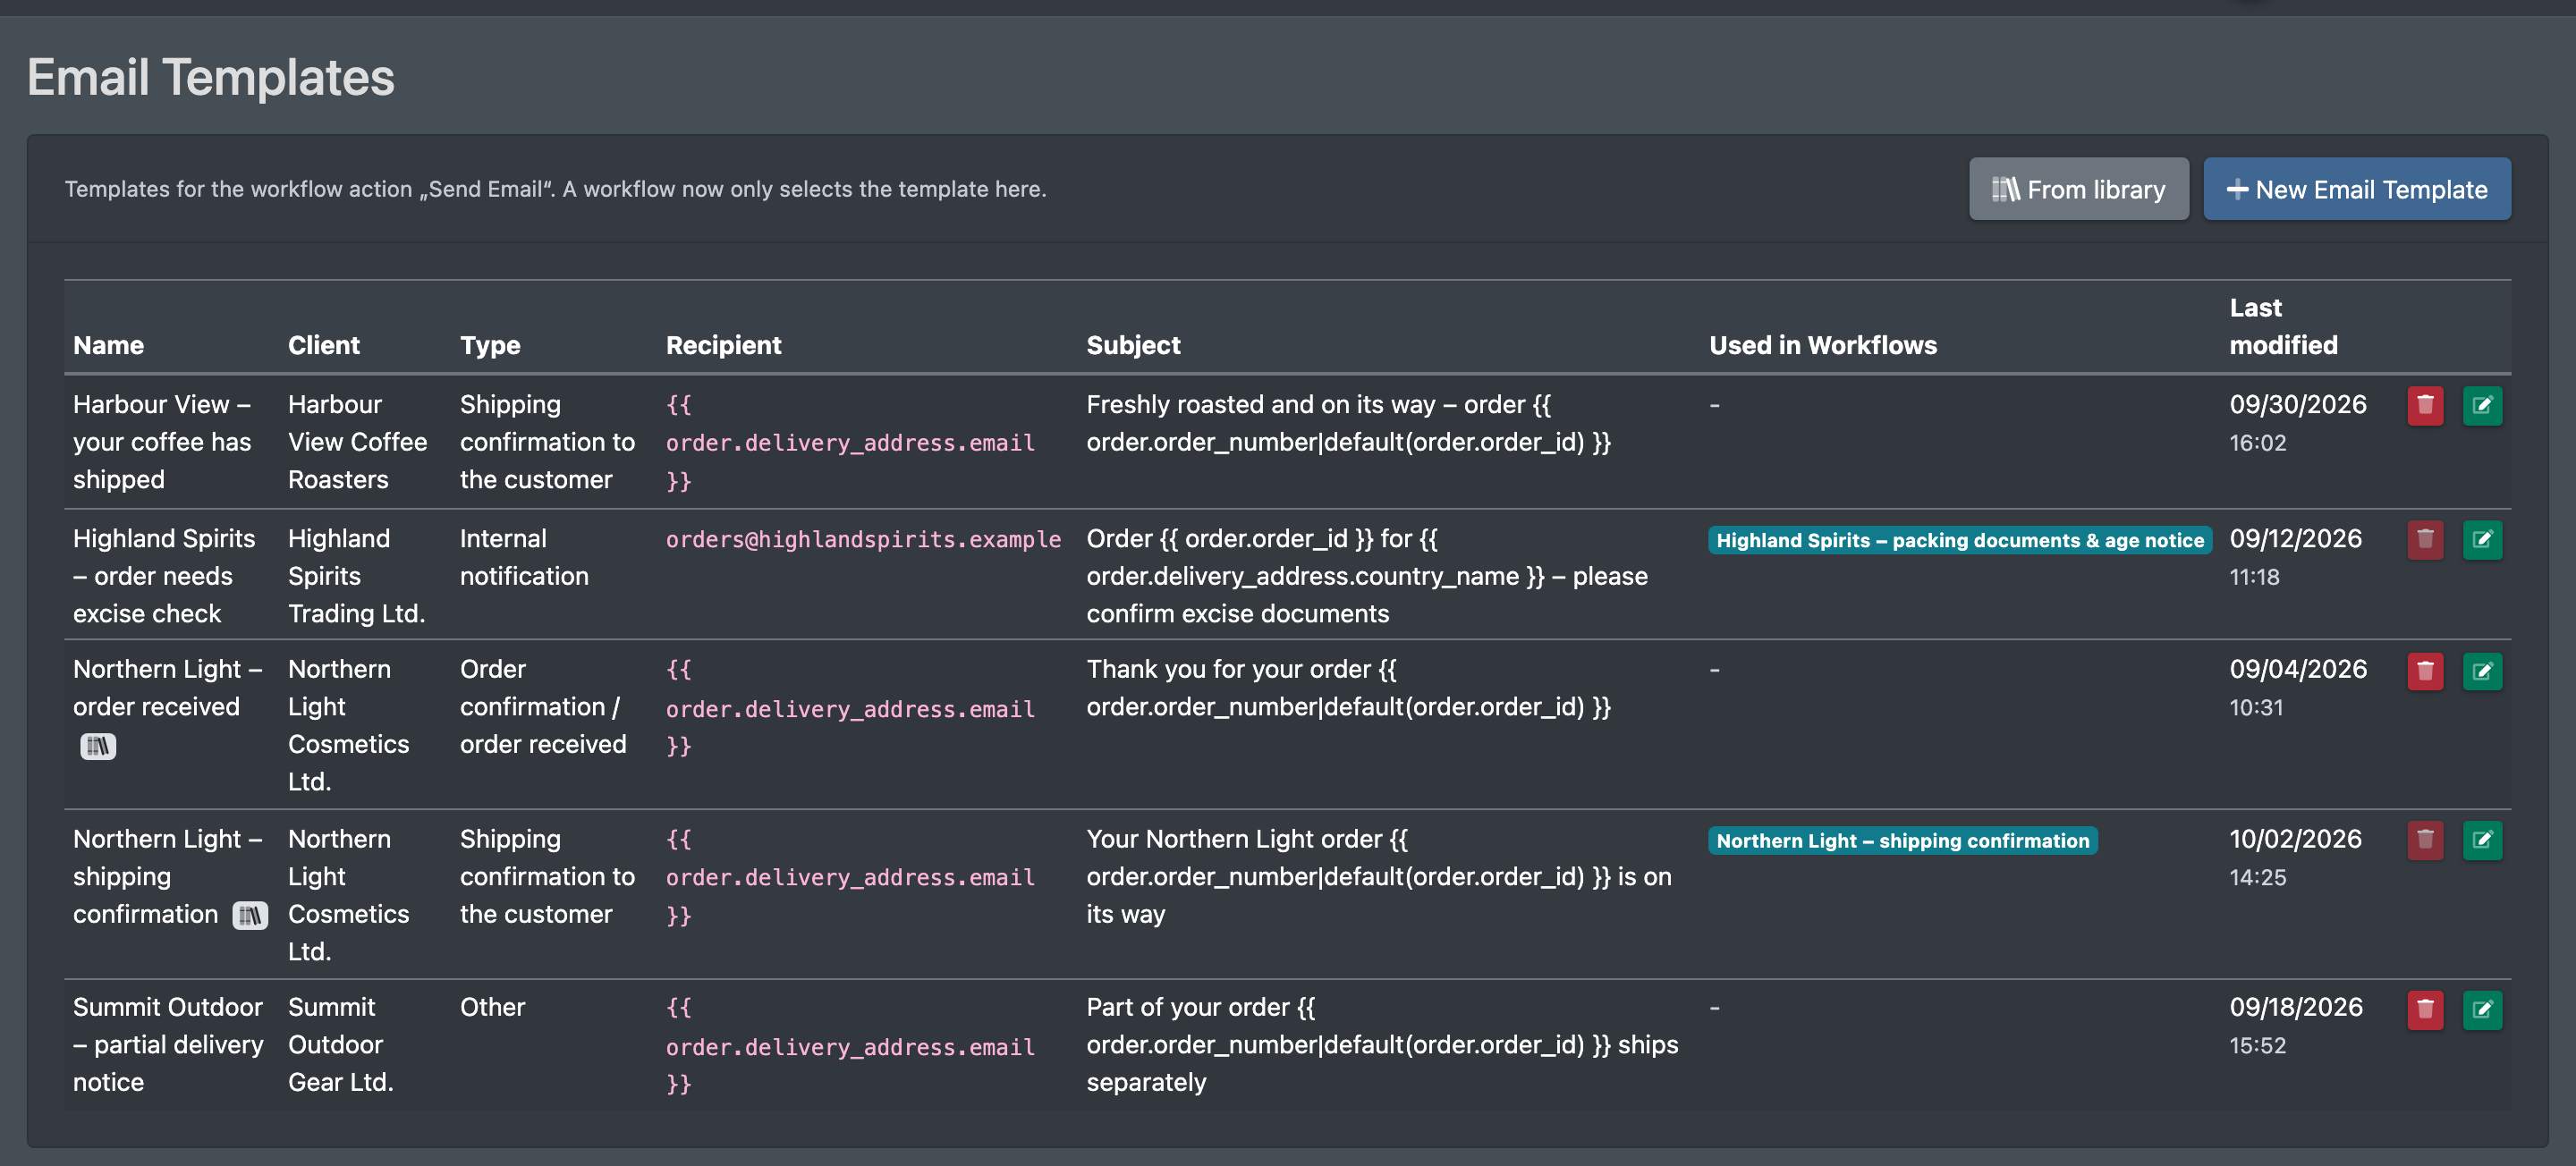
Email templates contain the recipient, subject and text of an email for the workflow action Send Email (E-Mail senden). The text is HTML with placeholders that X-Sitter fills from the order. A workflow only chooses the template. Typical examples are shipping confirmations to end customers or internal notifications.
The emails X-Sitter sends by itself – login details, password reset – are adapted under System email templates.
Before you start
- Your user needs the permissions for Settings (Einstellungen) and Email Templates (E-Mail-Vorlagen) in the WMS menu. Opening the form and deleting templates are separate permissions – ask your administrator.
- The client the template is for – see Clients.
Start from the email library
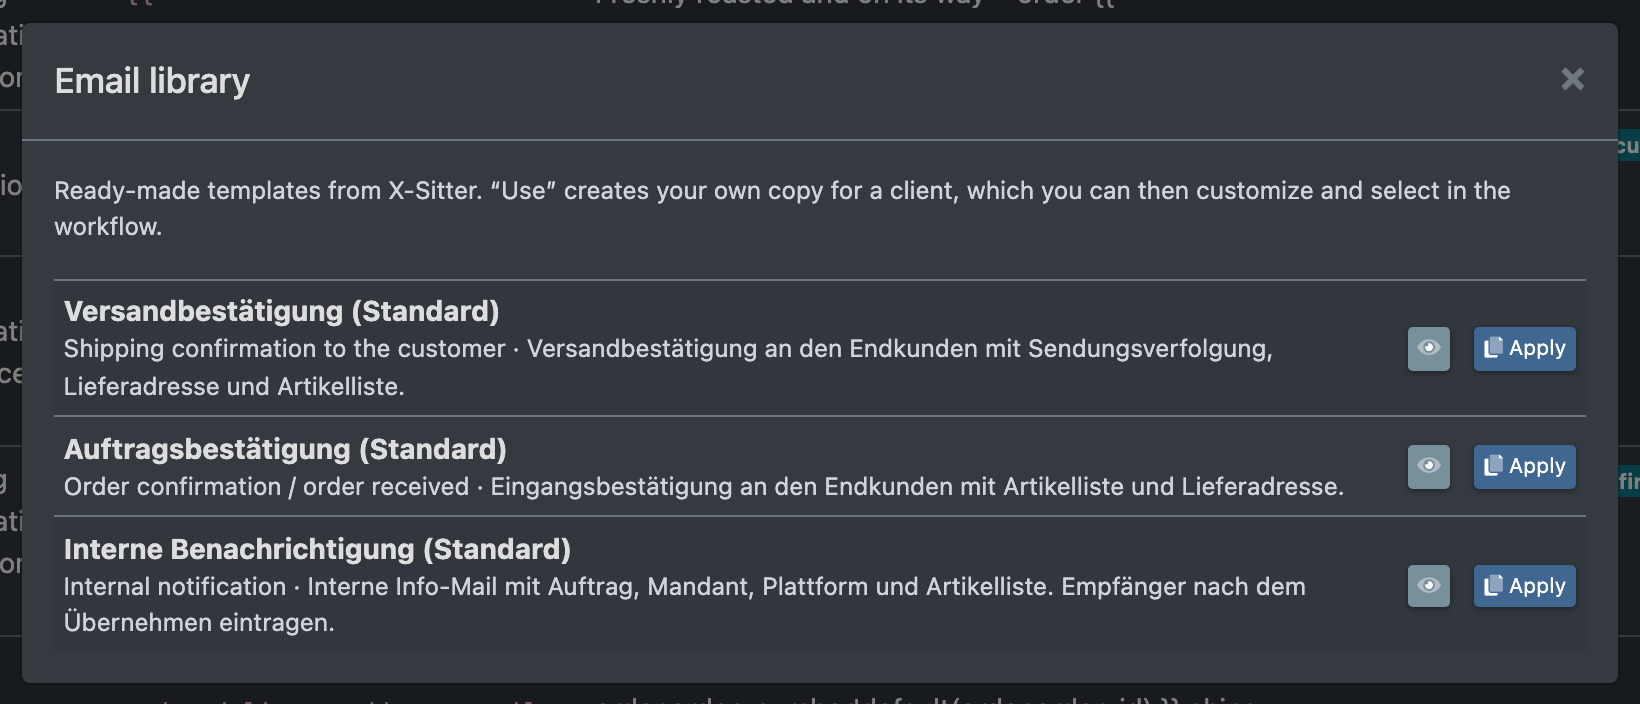
X-Sitter provides ready-made templates in the Email library (E-Mail-Bibliothek).
- In the overview click From library (Aus Bibliothek).
- Preview a template with the eye icon.
- Click Apply (Übernehmen). X-Sitter creates your own copy for a client, which you can then adapt and select in a workflow.
Copies from the library are marked with a book icon. When X-Sitter publishes a new version of a library template, your copy shows New version available (Neue Version verfügbar). You can then
- take over subject and text from the new version (sync button), or
- click Keep (Behalten) to keep your version and hide the notice.
Create a template
- Open WMS › Settings › Email Templates (WMS › Einstellungen › E-Mail-Vorlagen).
- Click New Email Template (Neue E-Mail-Vorlage).
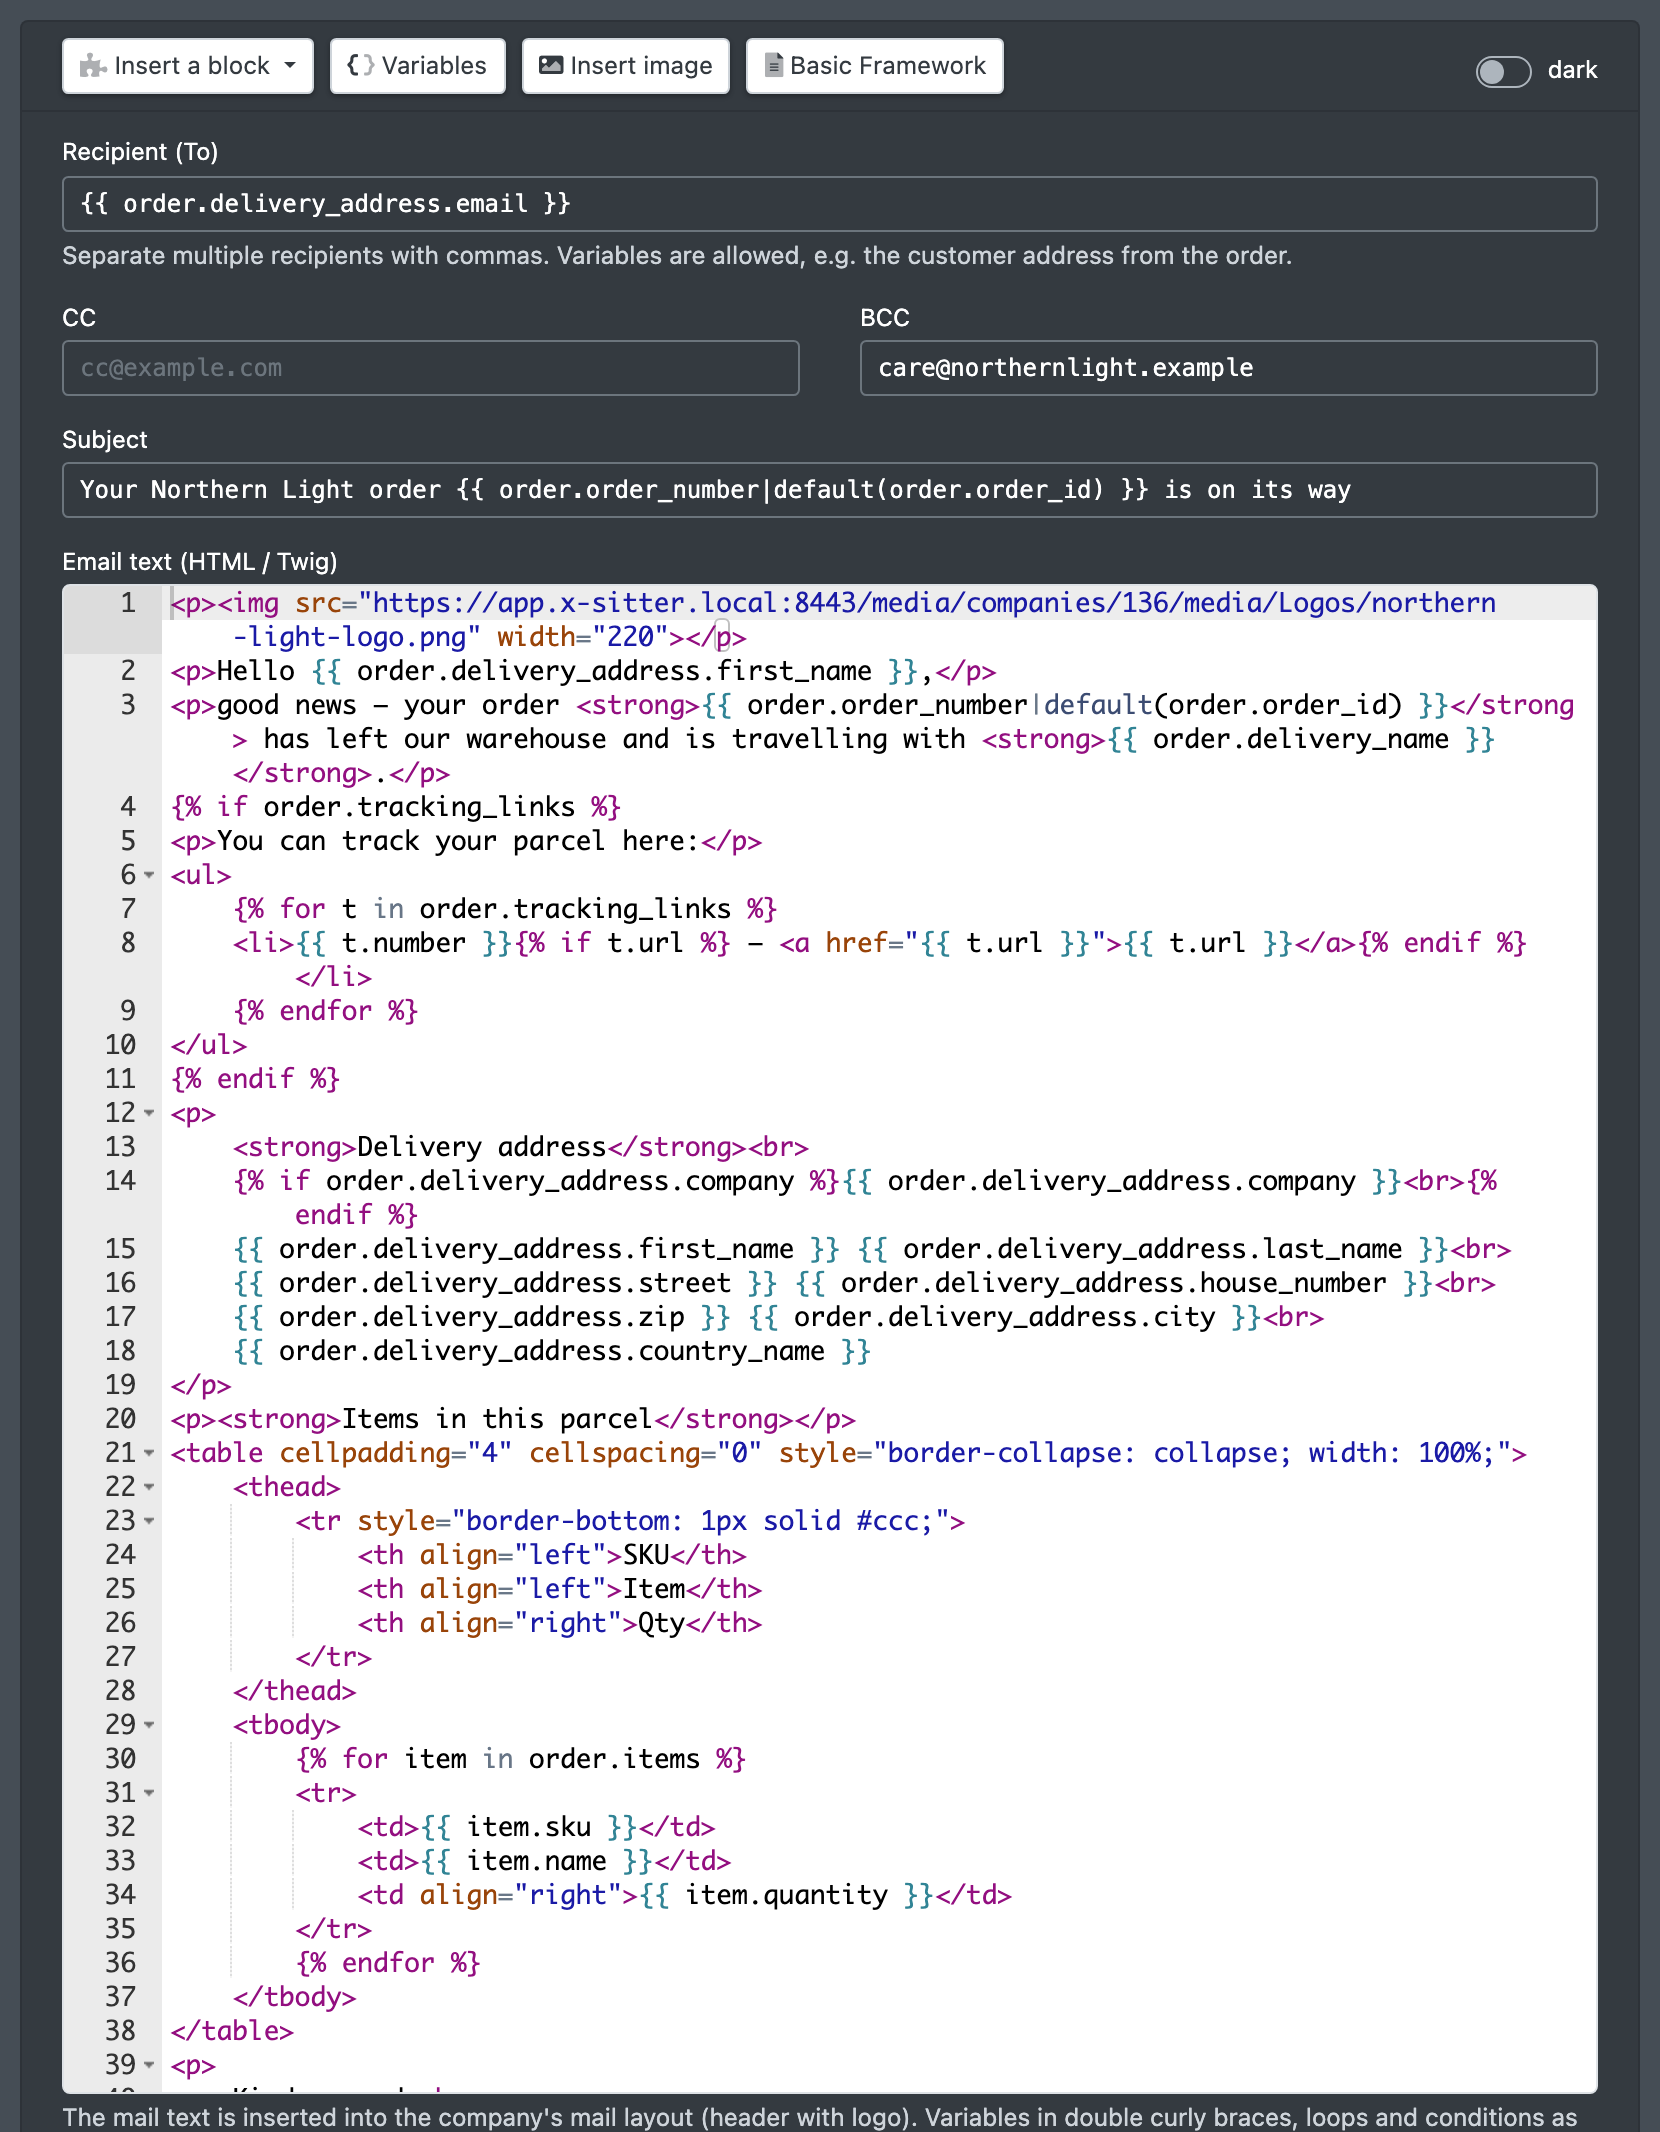
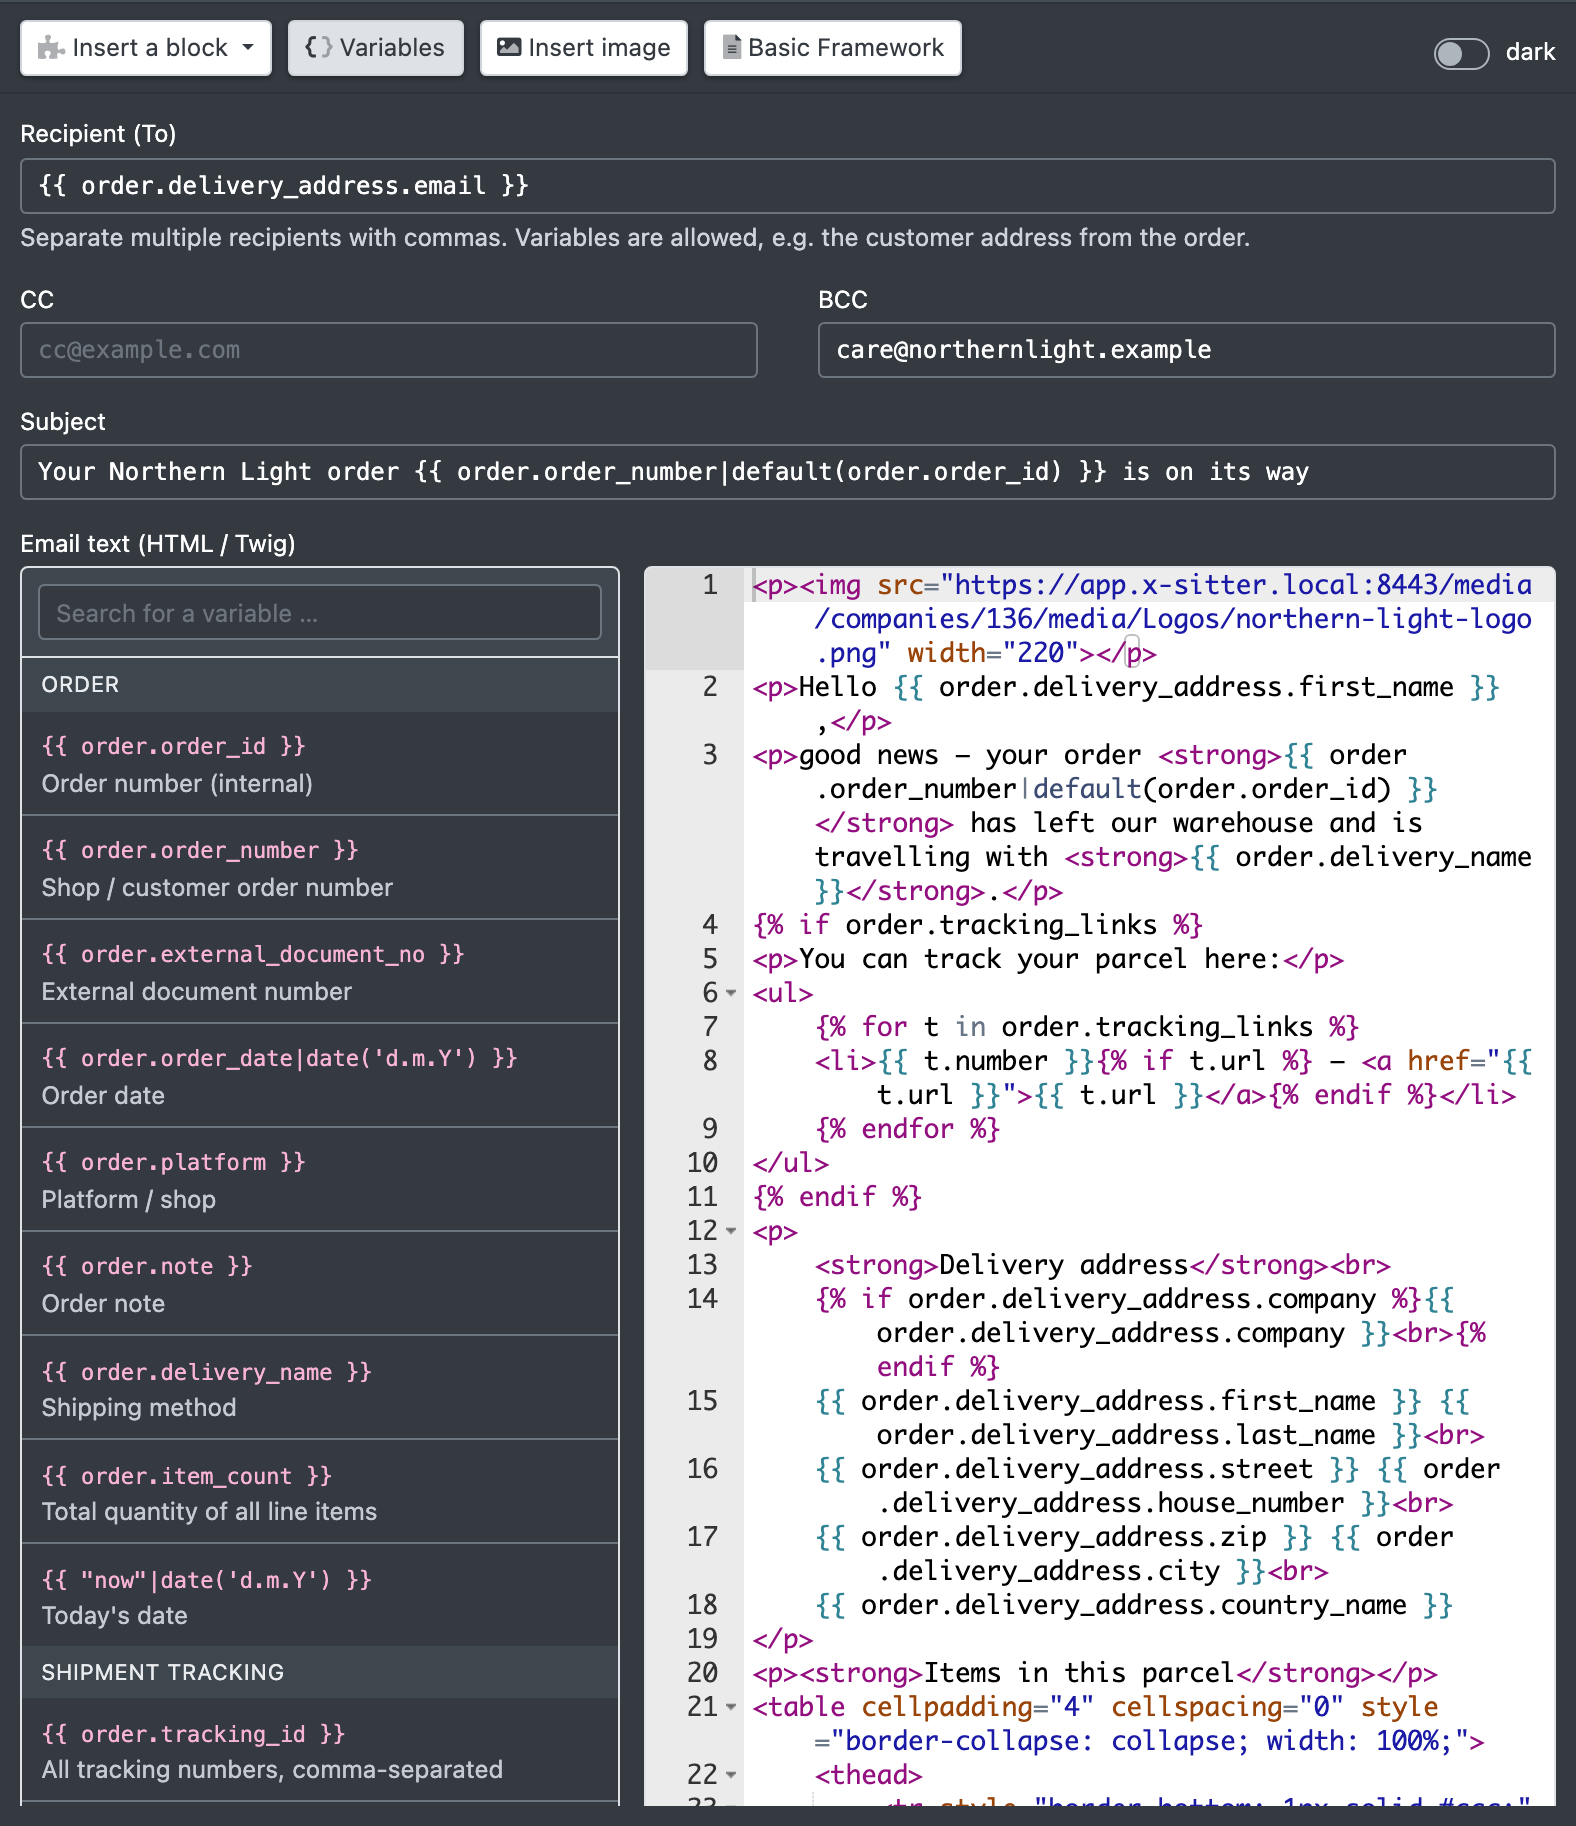
- In the Settings (Einstellungen) panel on the right enter the Template Name (Name der Vorlage), the Client (Mandant), the Email Type (Mailtyp) and the Email Text Format (Format des Mailtexts).
- Fill in Recipient (To) (Empfänger (An)), optionally CC and BCC, and the Subject (Betreff).
- Write the Email text (HTML / Twig) (Mailtext (HTML / Twig)). Helpers in the toolbar:
- Insert a block (Baustein einfügen) – ready-made blocks such as salutation, tracking numbers with link, delivery address, item table, closing with company details, or a condition.
- Variables (Variablen) – a searchable list of all placeholders ("Search for a variable …"). A click inserts the code at the cursor position.
- Insert image (Bild einfügen) – a logo or image from the media management.
- Basic Framework (Grundgerüst) – inserts a complete starter text for the selected email type.
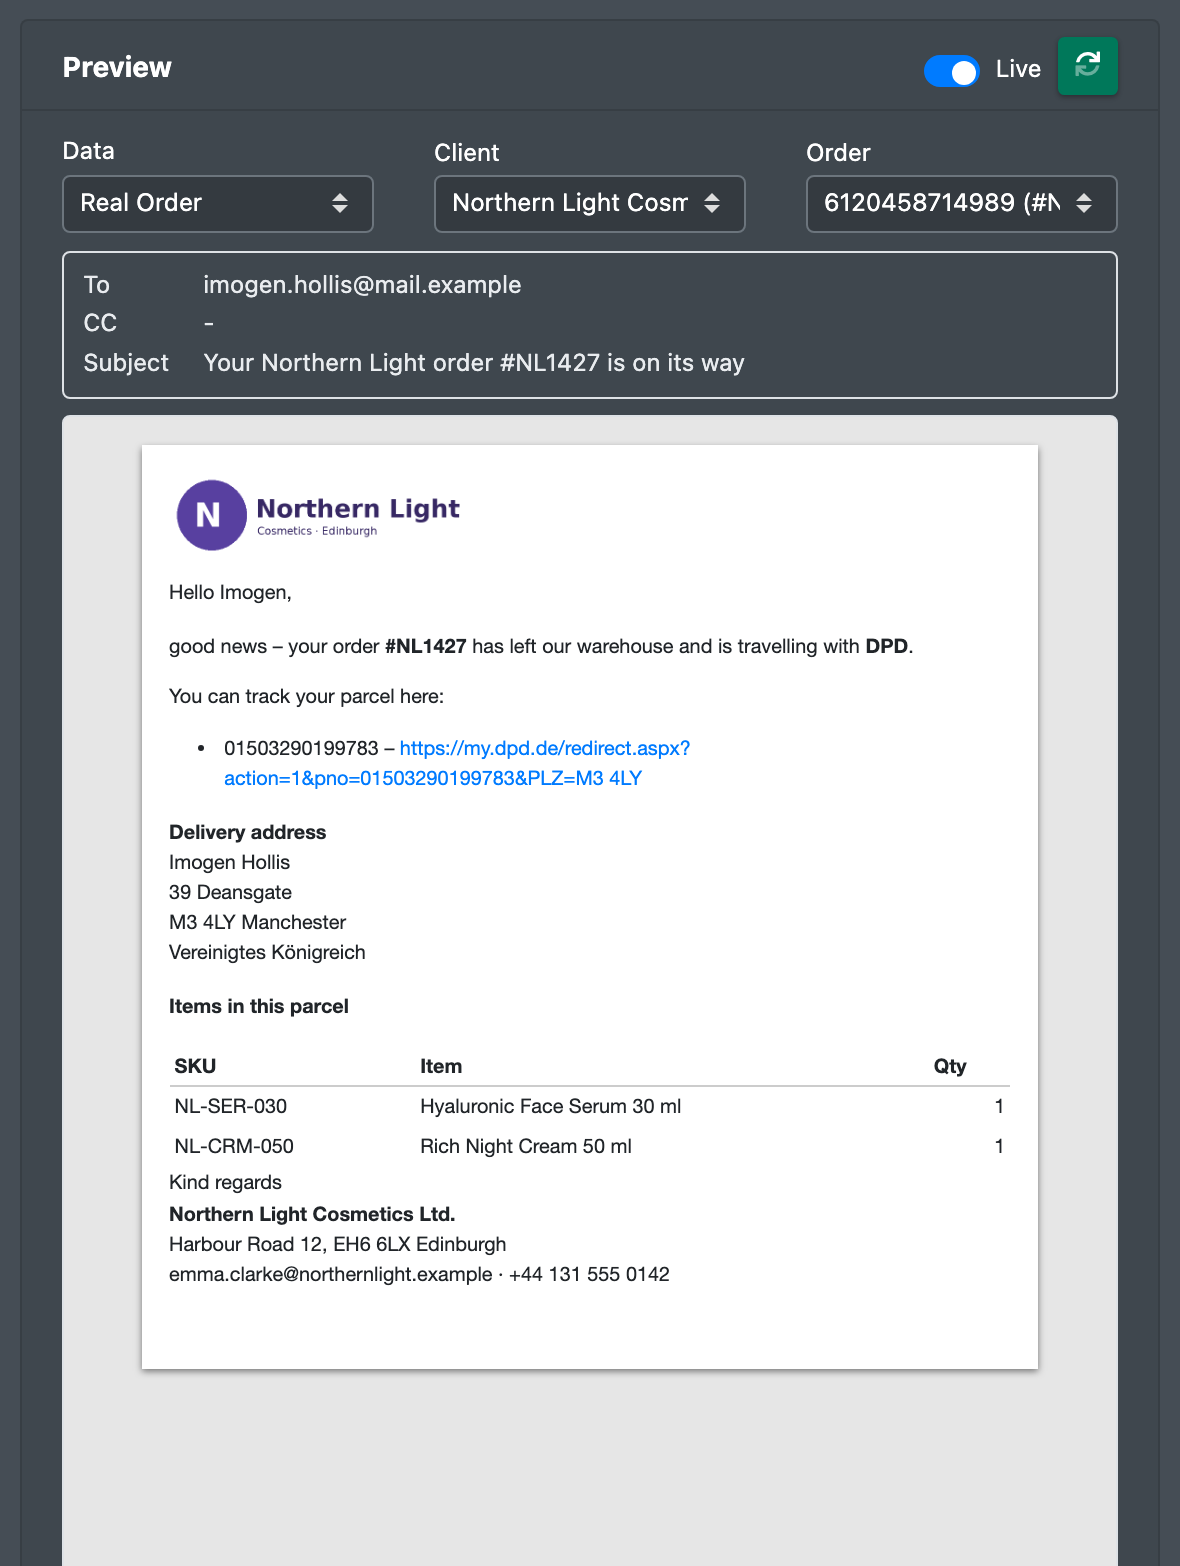
- Check the Preview (Vorschau) with Sample Data (Beispieldaten) or a Real Order (Echter Auftrag), and click Refresh Preview (Vorschau aktualisieren) if needed.
- Click Save (Speichern) – or press Ctrl/Cmd + S.
- In the workflow choose this template under Send Email – see Workflows.
Fields and options
Placeholders
Placeholders are written as the variable name in double curly braces – for example the variable name order.order_number in double curly braces becomes the shop's order number. The easiest way is to insert them from the Variables panel. Loops and conditions work the same way as in the PDF templates; the ready-made blocks already contain them.
For a shipping confirmation, use the customer's email (order.delivery_address.email) as recipient and the block "tracking numbers with link" in the text. In the workflow, tick Send only once per order so the customer gets the email only once.
Delete a template
Click the delete icon in the overview. A template that is still used in workflows cannot be deleted – the button is disabled ("Still used in workflows"). Choose another template in those workflows first.