
Import advance notices
Create advance notices from CSV or Excel files with a reusable import template
Suppliers and clients often send their delivery advice as a CSV or Excel file. Instead of typing it in, you set up an import template once. The template says which column of the file belongs to which field of the advance notice. After that, you check and import new files in a few clicks.
Before you start
- Your user needs the permissions for Notifications and Import. Ask your administrator if the Import button is missing.
- The client exists, see Clients.
- The articles exist in the client's article master, see Create an article. Depending on the template, unknown articles can also be accepted.
- Have a sample file of the supplier at hand.
Step by step
Create an import template
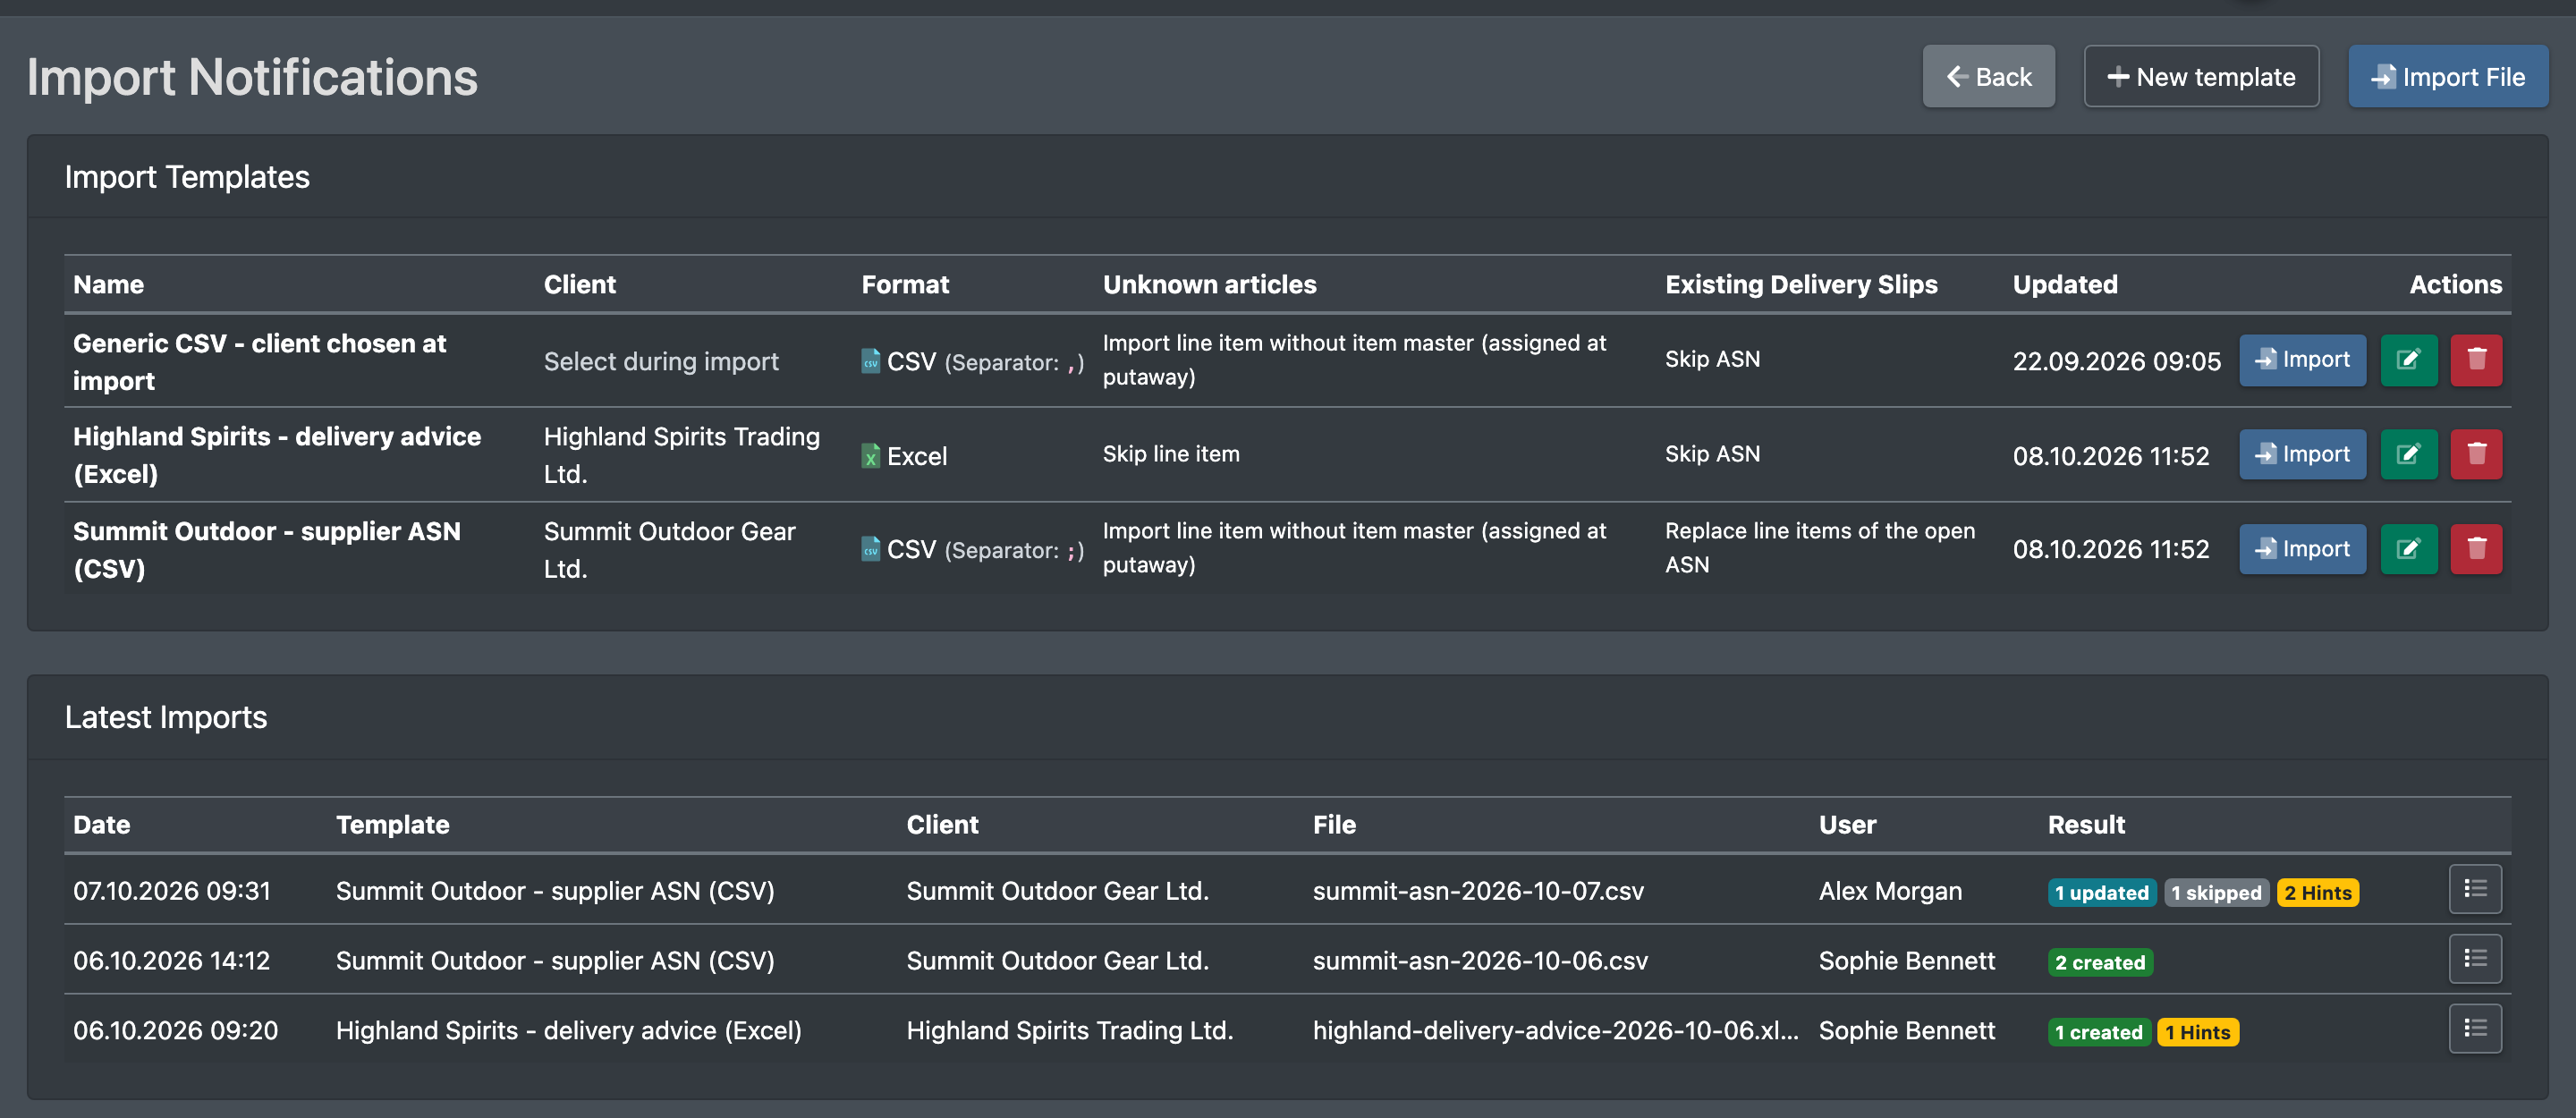
- Open WMS › Notifications (WMS › Avisierungen) and click Import (Import). The page Import Notifications (Avisierungen importieren) opens.
- Click New template (Neue Vorlage).
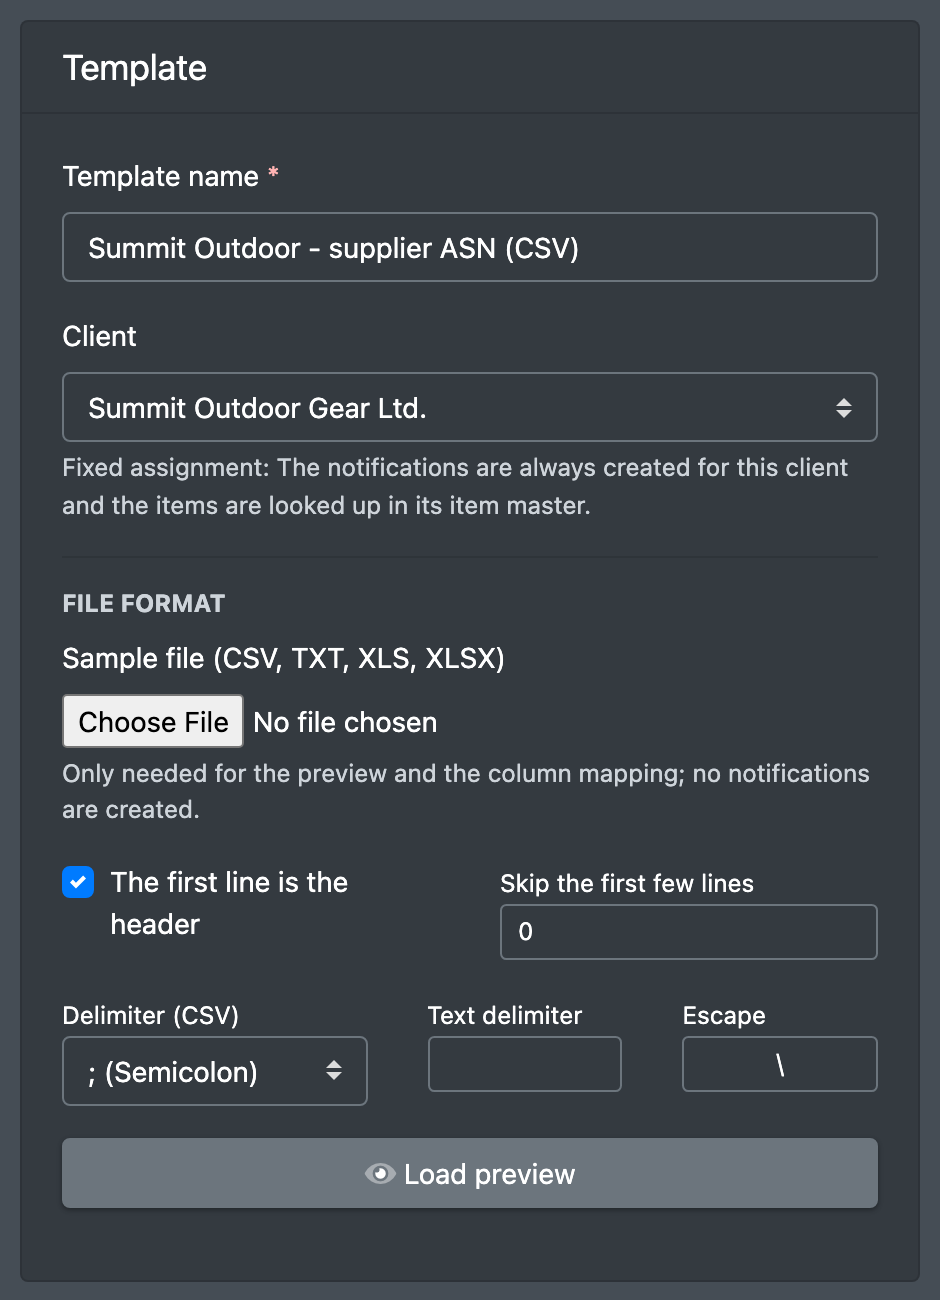
- Fill in the basics:
- Template name (Vorlagenname), e.g. "Supplier Miller (Excel)".
- Client (Mandant): assign a fixed client, or Select during import (beim Import wählen). With a fixed client, notices are always created for this client and articles are searched in its article master.
- File format (Dateiformat) and Sample file (CSV, TXT, XLS, XLSX) (Beispieldatei). The sample is only used for the preview and the column mapping – no notices are created.
- The first line is the header (Erste Zeile ist Kopfzeile) and Skip the first few lines (Zeilen am Anfang überspringen).
- For CSV: Delimiter (CSV) (Trennzeichen) – semicolon, comma, tab or pipe – plus Text delimiter (Textbegrenzer) and Escape.
- Click Load preview (Vorschau laden). The File Preview (Datei-Vorschau) shows the first rows of your file.
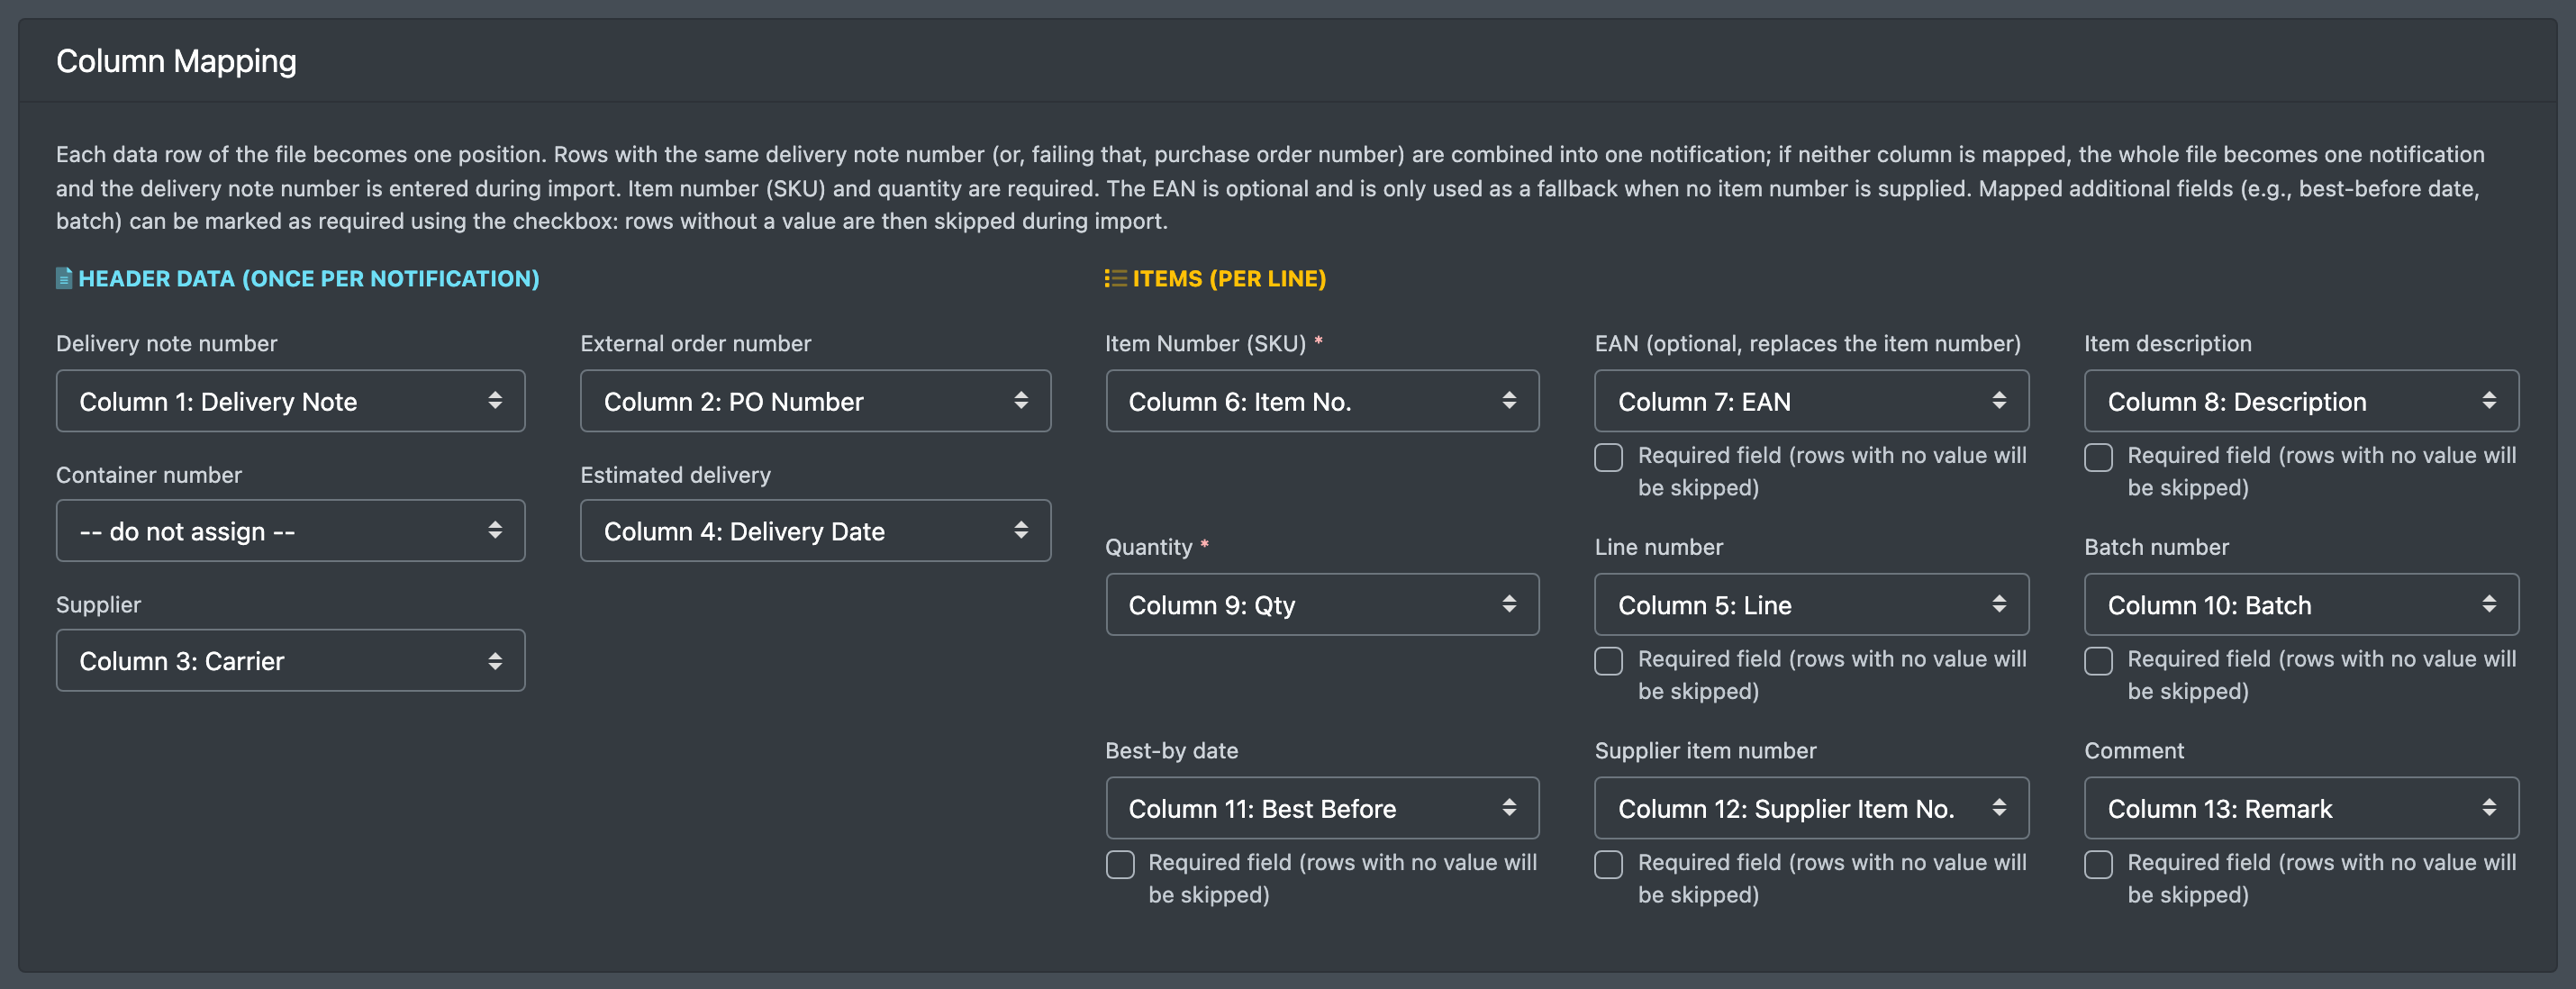
- Under Column Mapping (Spaltenzuordnung), choose the matching column for each field (see
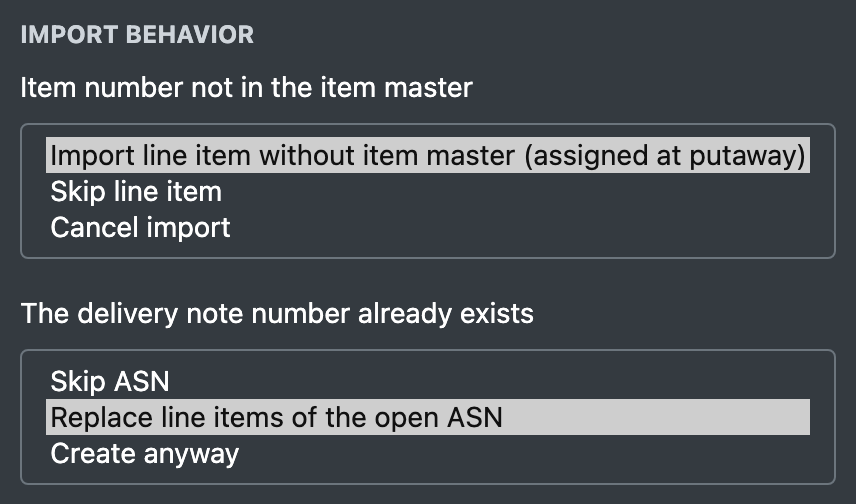
Fields and options ). - Set the Import Behavior (Verhalten beim Import).
- Click Save template (Vorlage speichern).
Import a file
- On Import Notifications, click Import File (Datei importieren), or Import (Importieren) next to a template.
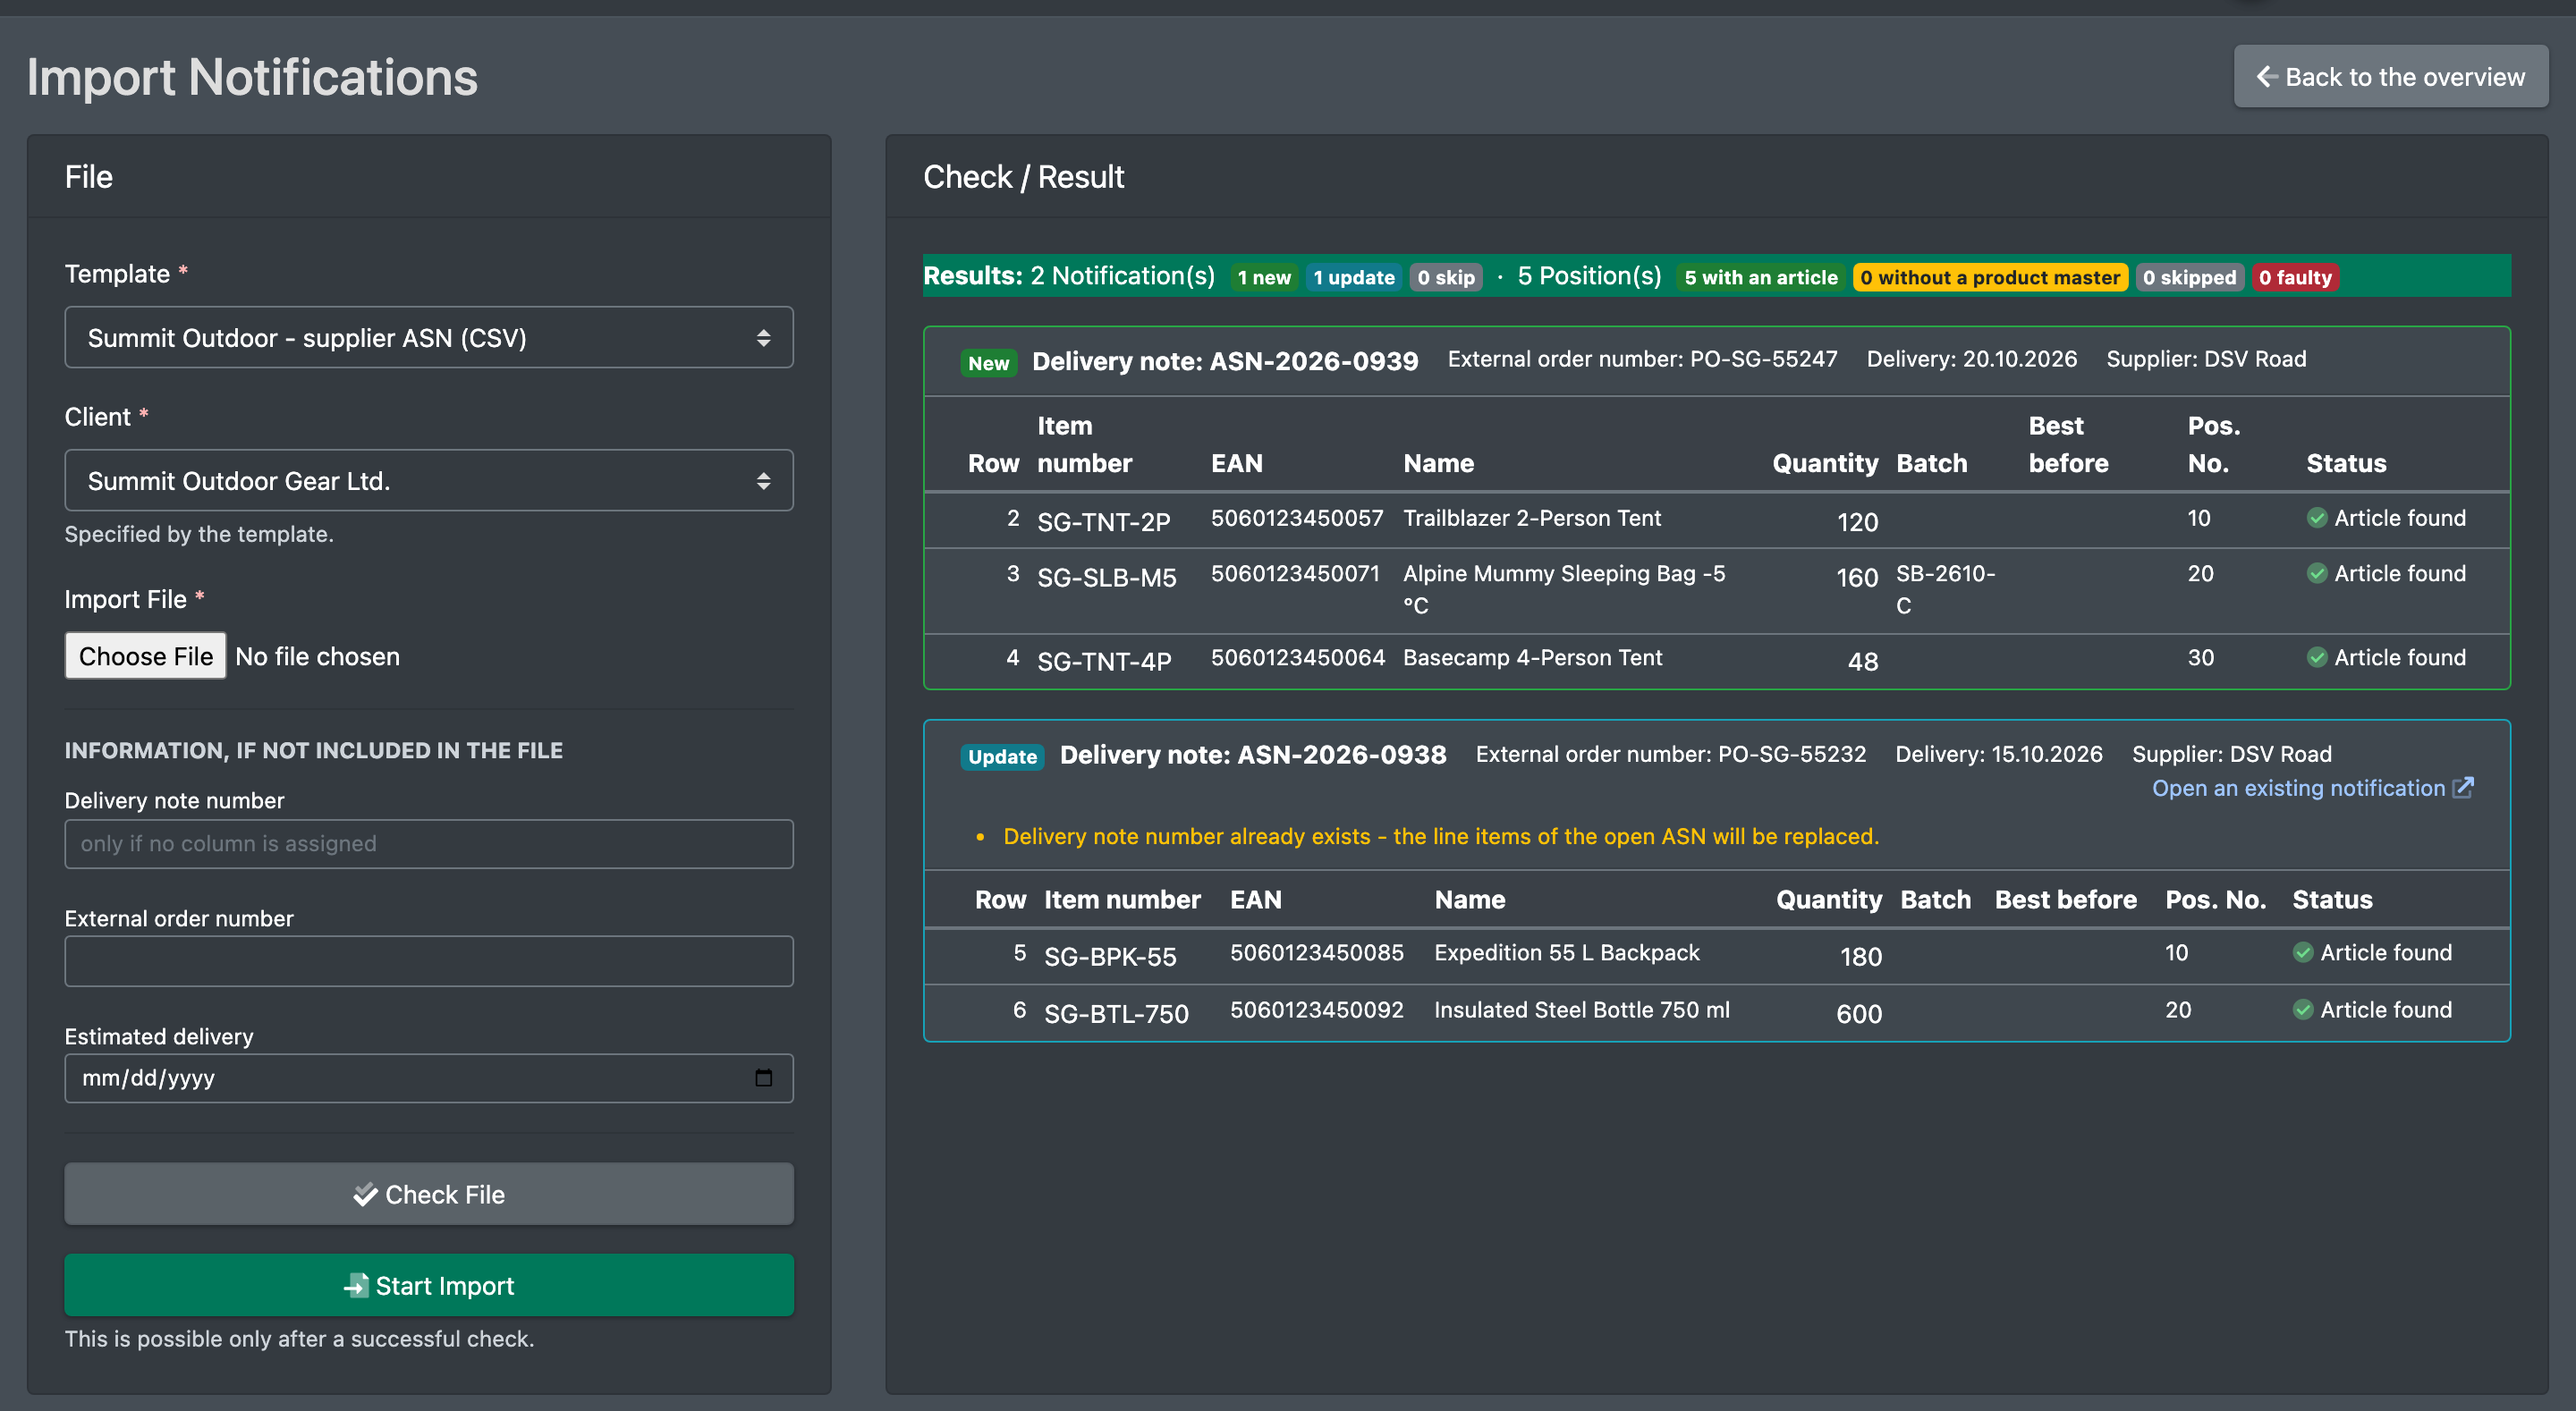
- Select the Template (Vorlage), the Client (Mandant) if the template does not fix it, and the Import File (Import-Datei).
- Under Information, if not included in the file (Angaben, falls nicht in der Datei enthalten) you can enter a Delivery note number (only used if no column is assigned), an Order number and an Estimated delivery date.
- Click Check File (Datei prüfen). The result area shows which notices and items would be created and lists hints and errors.
- If the check is fine, click Start Import (Import starten). The button is only active after a successful check.
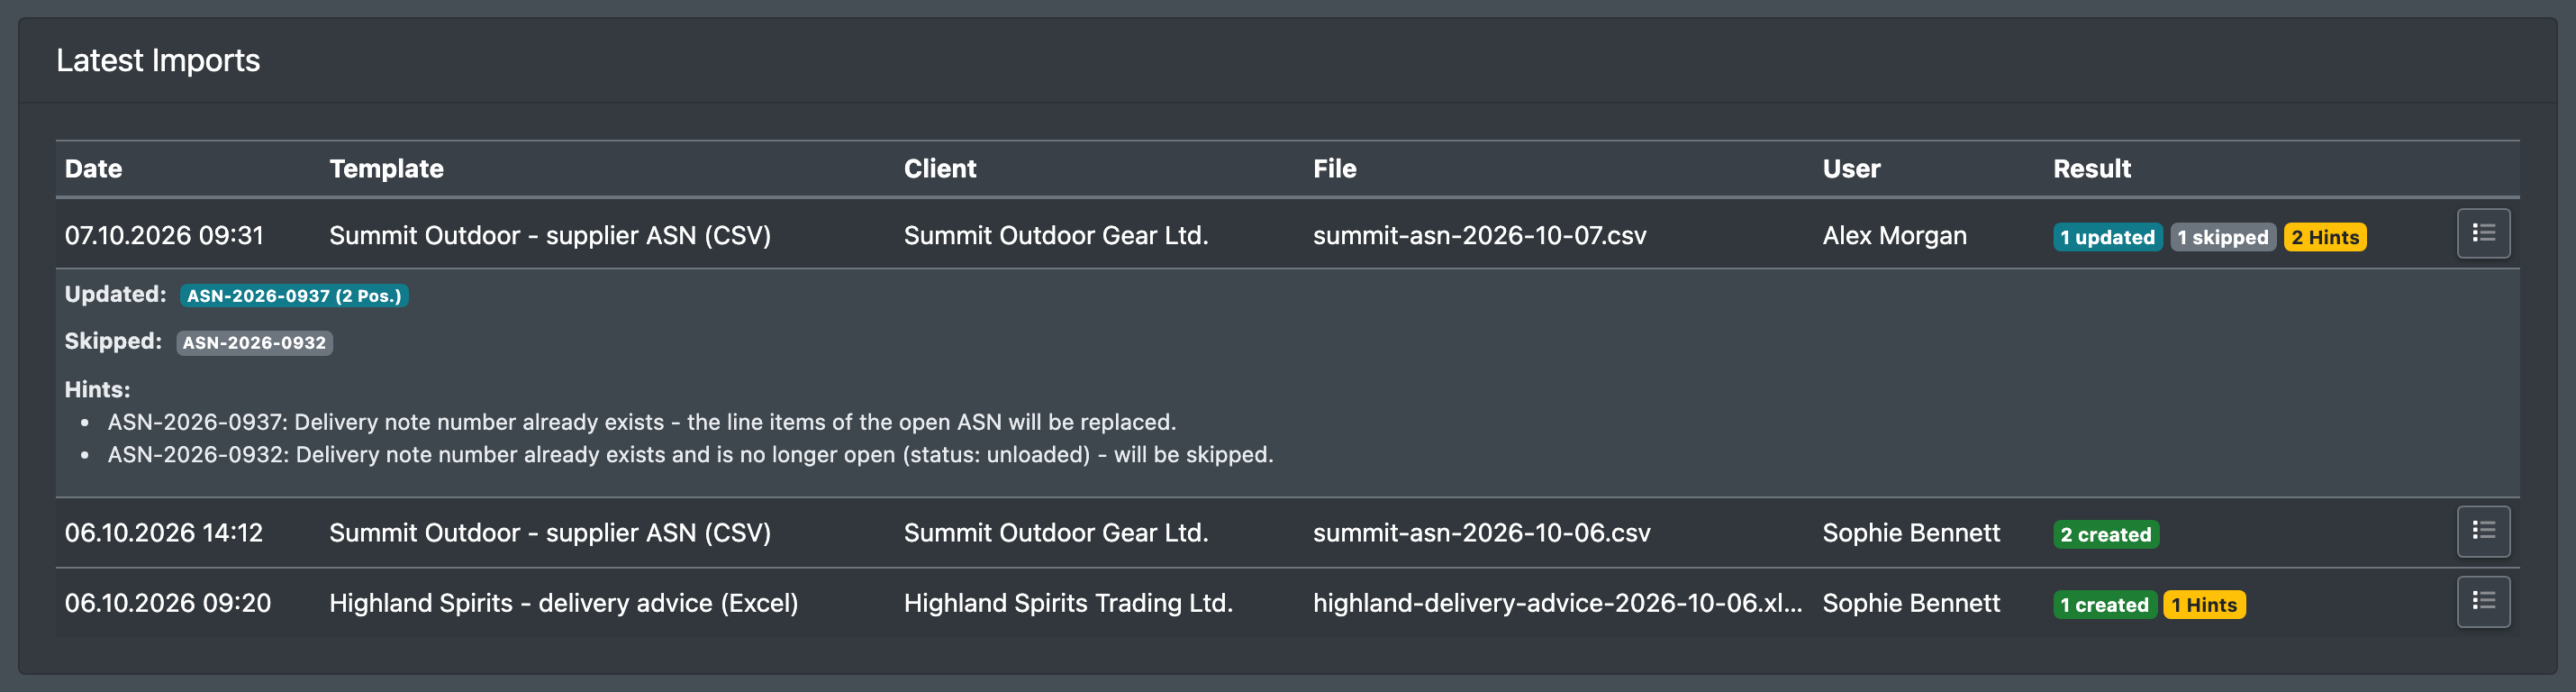
- The result appears under Latest Imports (Letzte Importe): created, updated and skipped notices, hints, errors and details.
Fields and options
Column mapping
Header Data (once per notification) (Kopfdaten (einmal je Avisierung)):
Items (per line) (Positionen (je Zeile)):
You can tick additional fields such as best-before date or batch as required. Rows without a value in a required field are then skipped.
Import behavior
How rows become notices
- Every data row becomes one item.
- Rows with the same delivery note number (or, if that is not mapped, the same order number) are combined into one advance notice.
- If neither column is mapped, the whole file becomes one notice. Enter the delivery note number when you import.
- New notices start with the status Open, see Advance notices.
- Replace line items of the open ASN only works while the existing notice is still open. Notices that are already in progress or closed are skipped.
- Items without an article in the master data can be added to the master data later at the putaway scanner with Import Items into Master Data (Artikel in die Stammdaten übernehmen), see Putaway.
- Deleting a template does not delete the notices you already imported with it.