
Create an article
Create a single new article by hand and choose which input fields the creation dialog shows.
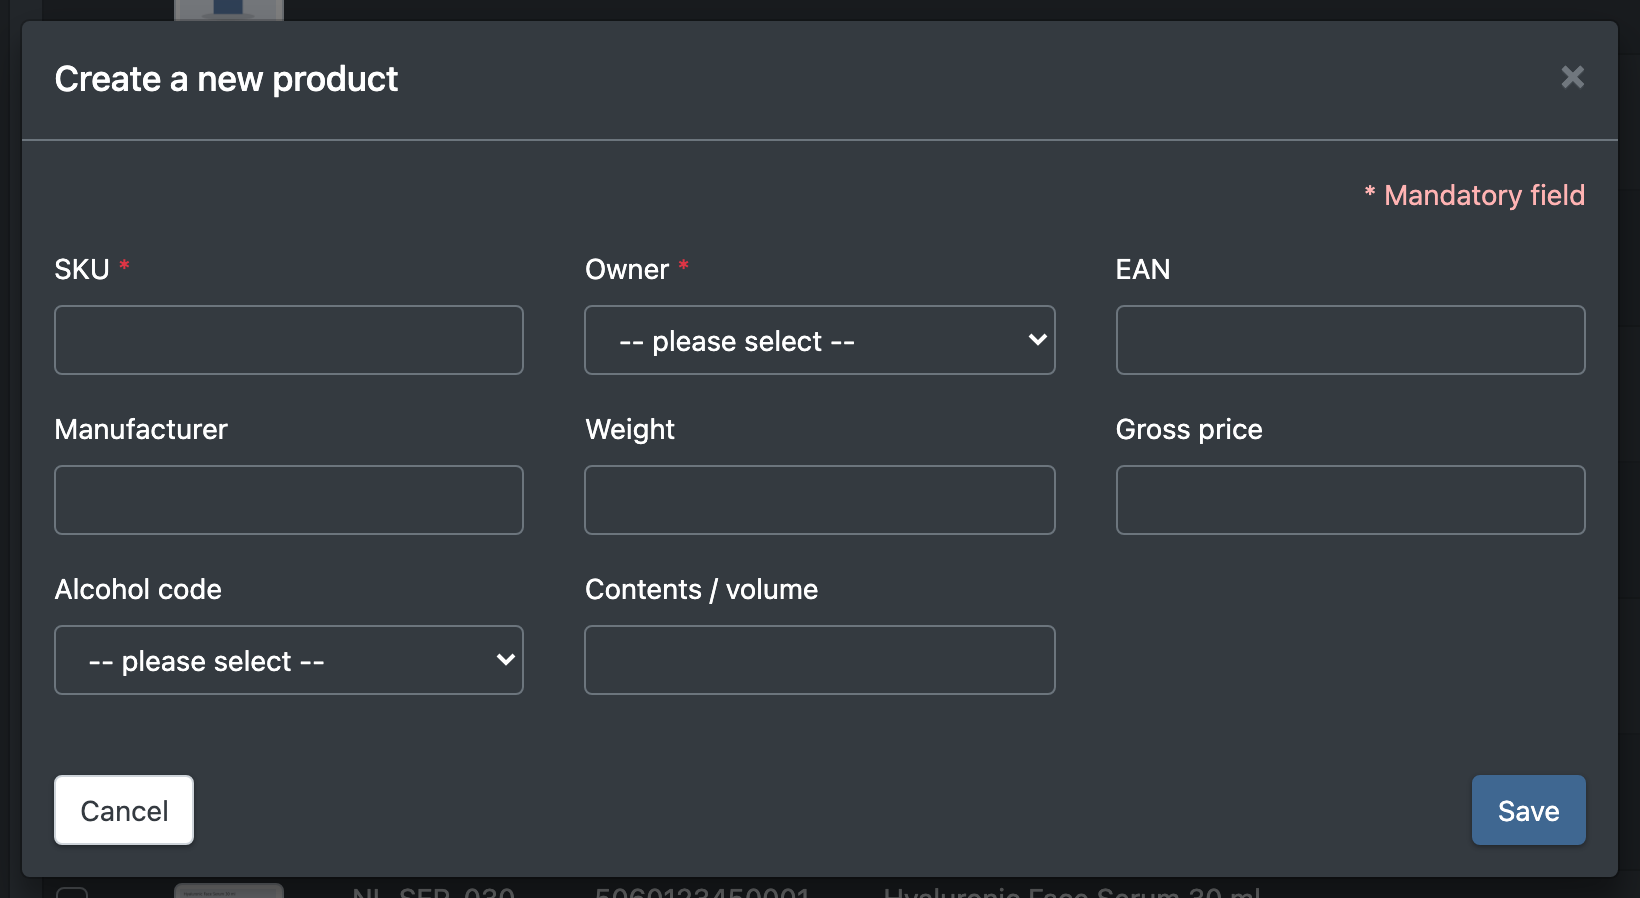
You can create a single new article directly in the catalogue. Which input fields appear in the Create a new product (Neues Produkt anlegen) dialog is set up once per company with Configure input fields (Eingabefelder konfigurieren).
If you want to create many articles at once, use an import instead, see Import templates.
Before you start
- Your user needs the permission to use the product actions and to create products. To configure the input fields you need the additional permission for the creation settings. Ask your administrator if the buttons are missing.
- Attribute groups and fields must exist, at least name and SKU. See Attribute groups and Attribute fields.
- The input fields must be configured first (step 1 below). Otherwise you see the message "First, you must determine which fields are to be filled in."
- Optional for logisticians with clients: the attribute Owner (Eigentümer), so you can assign the article to a client, and a main category per client named exactly like the client's company, see Categories.
Step by step
1. Configure the input fields (once)
- Go to Catalogue › Overview (Katalog › Übersicht).
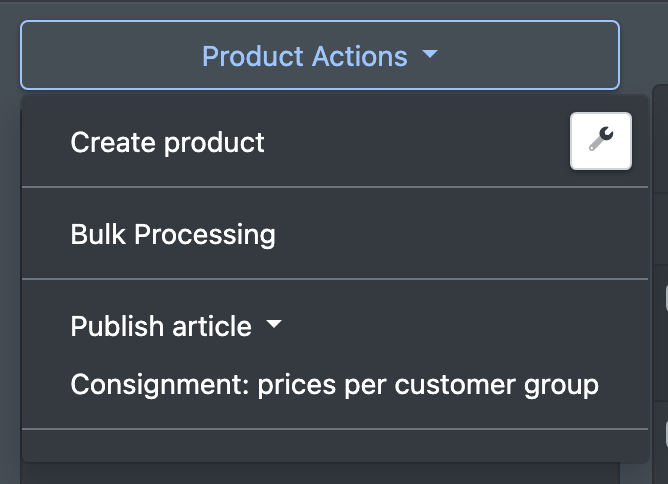
- Open the Product Actions (Produkt Aktionen) drop-down and click the wrench button next to Create product (Produkt anlegen).
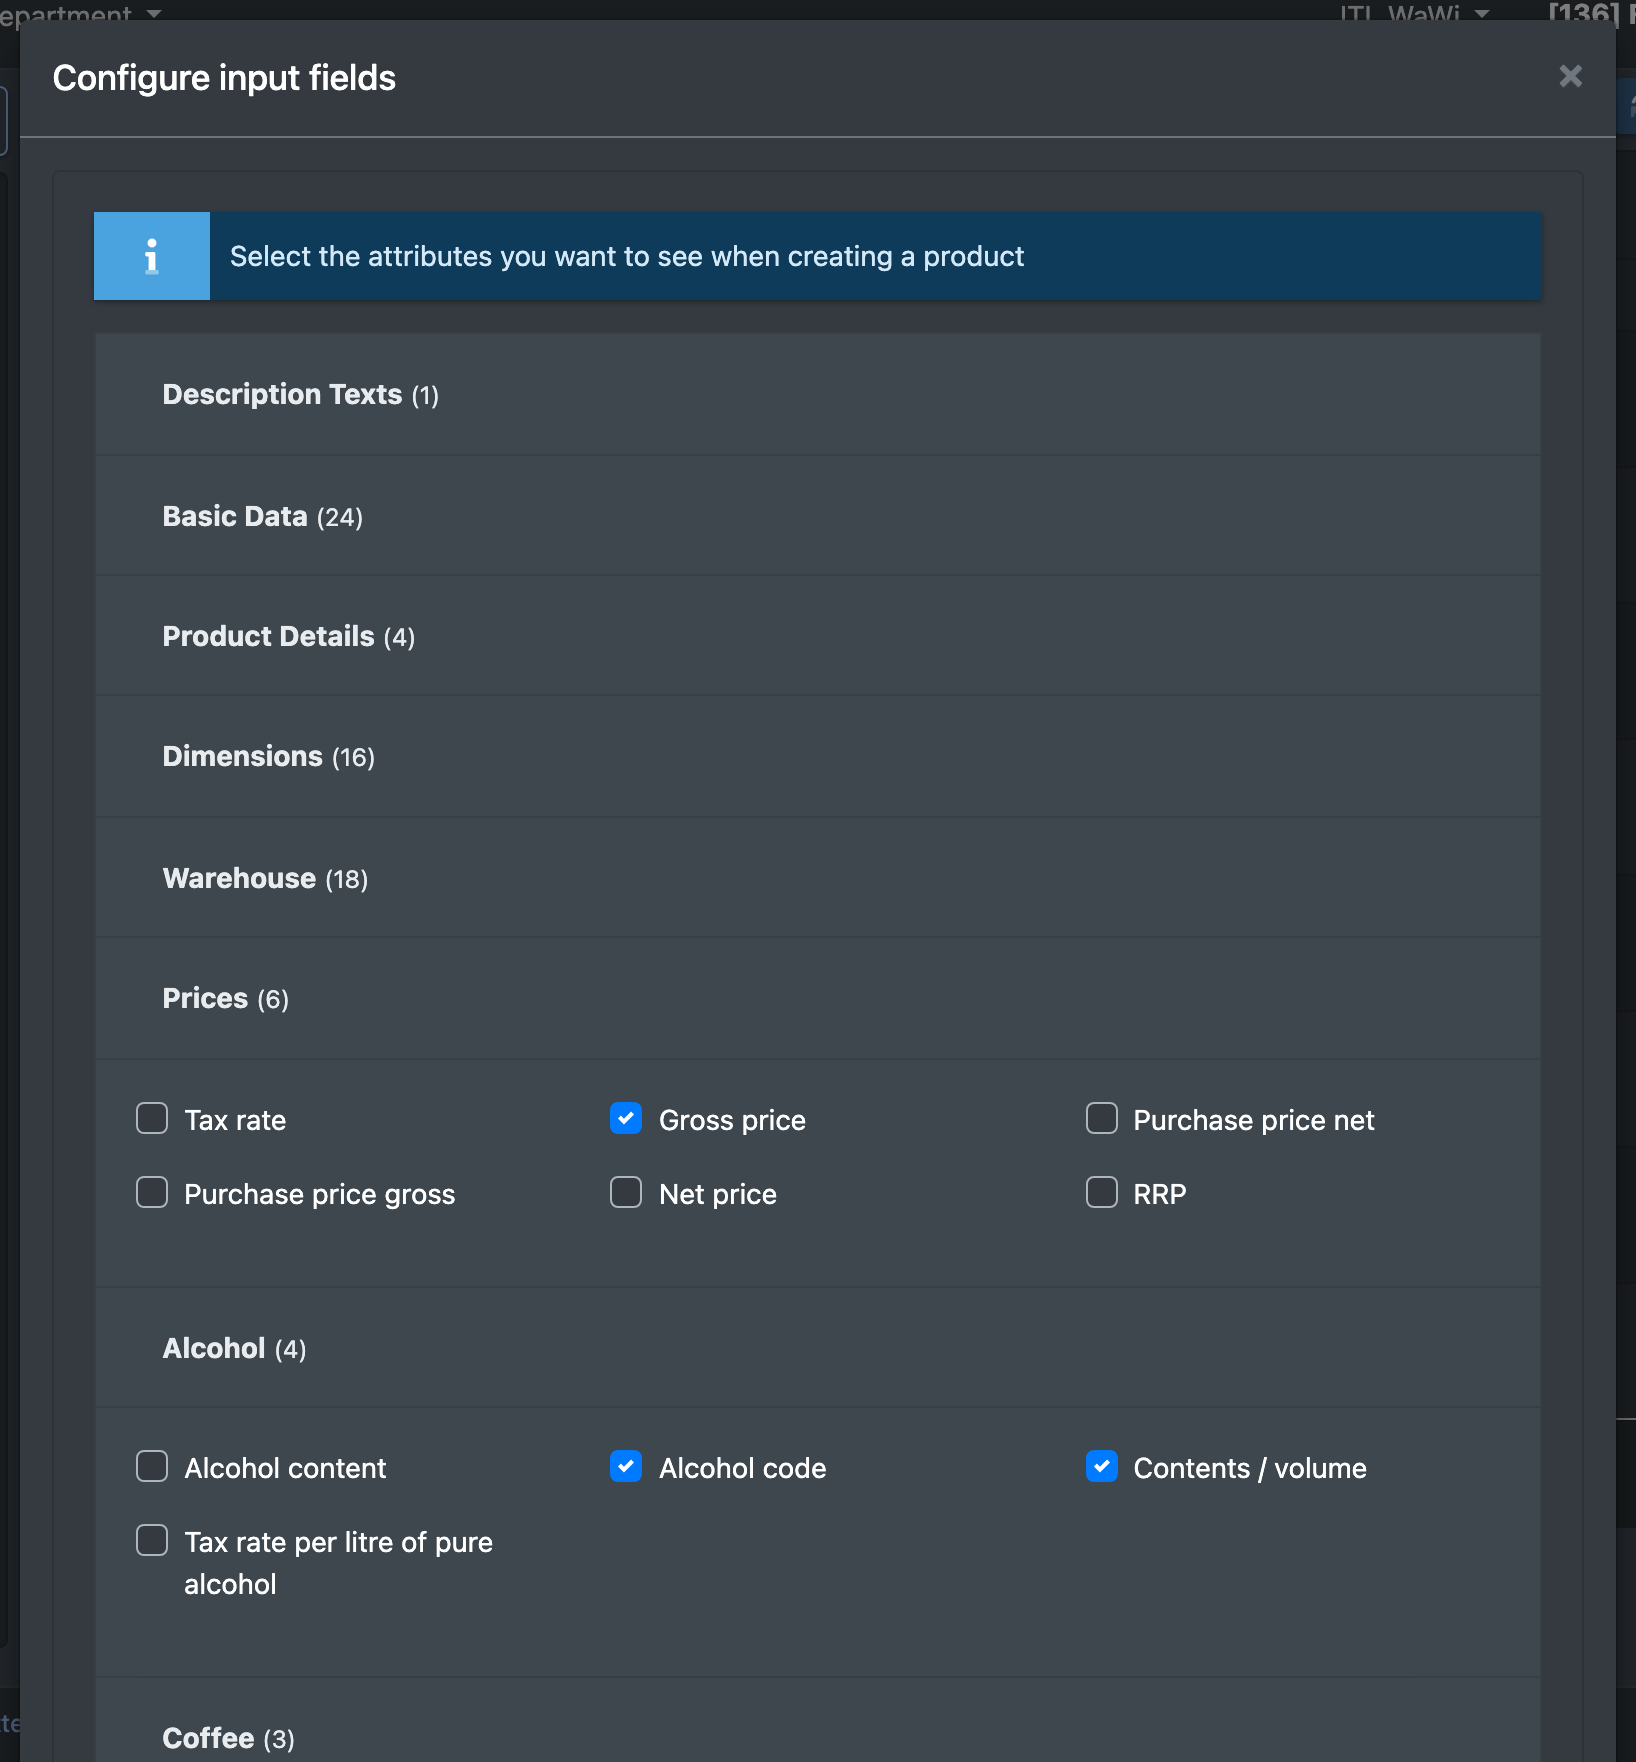
- In the dialog Configure input fields (Eingabefelder konfigurieren), expand the groups and tick the attributes you want to fill in when creating an article. Name and SKU are always included (immer enthalten).
- Click Save (Speichern). You see "Settings have been successfully saved".
If an attribute you need is missing, add it via the Attribute Management (Attribut-Verwaltung) link in the dialog, see Attribute fields.
2. Create the article
- Optional: click the target category in the category tree on the left. The new article is placed in this category.
- Open Product Actions (Produkt Aktionen) › Create product (Produkt anlegen).
- Fill in the fields. Required fields are marked.
- Click Save (Speichern).
- You see "The article has been created" (Der Artikel wurde angelegt). The overview reloads and searches for the new article right away.

Fields and options
Which category the article lands in
- If you selected a category in the tree, the article is assigned to it as its main category.
- If you selected an owner and there is an active category named exactly like that client's company, the article is placed there automatically – unless the category you selected in the tree already lies inside that client category.
What to do next
- Upload images: Article images
- Maintain further attributes: Edit an article
- Put the goods into stock: Putaway