Shipping providers
Under Shipping providers you decide how the shipping labels of your warehouse are created: through ShipCloud, or directly through the interfaces of DHL, DPD, GLS, UPS or Hermes. You store the carrier accounts – for your own company or for single clients, so each client can ship with its own carrier contract – and you define shipping rules. The rules are evaluated when a parcel is completed at the packing station and when a label is requested under Packages and tracking. Without any rule, ShipCloud is used.
Before you start
- Your user needs the permission Shipping providers in the Administration area of the permissions tree. Ask your administrator.
- Your company is the logistician. Clients cannot open this page – they see "Shipping rules and accounts are maintained by the logistician…".
- You have the access data from your carrier contract (see the table of required fields below).
- For ShipCloud you do not need an account in this list – ShipCloud uses the ShipCloud accounts under Company Settings.
- Carrier accounts are connections and count against your package.
Step by step
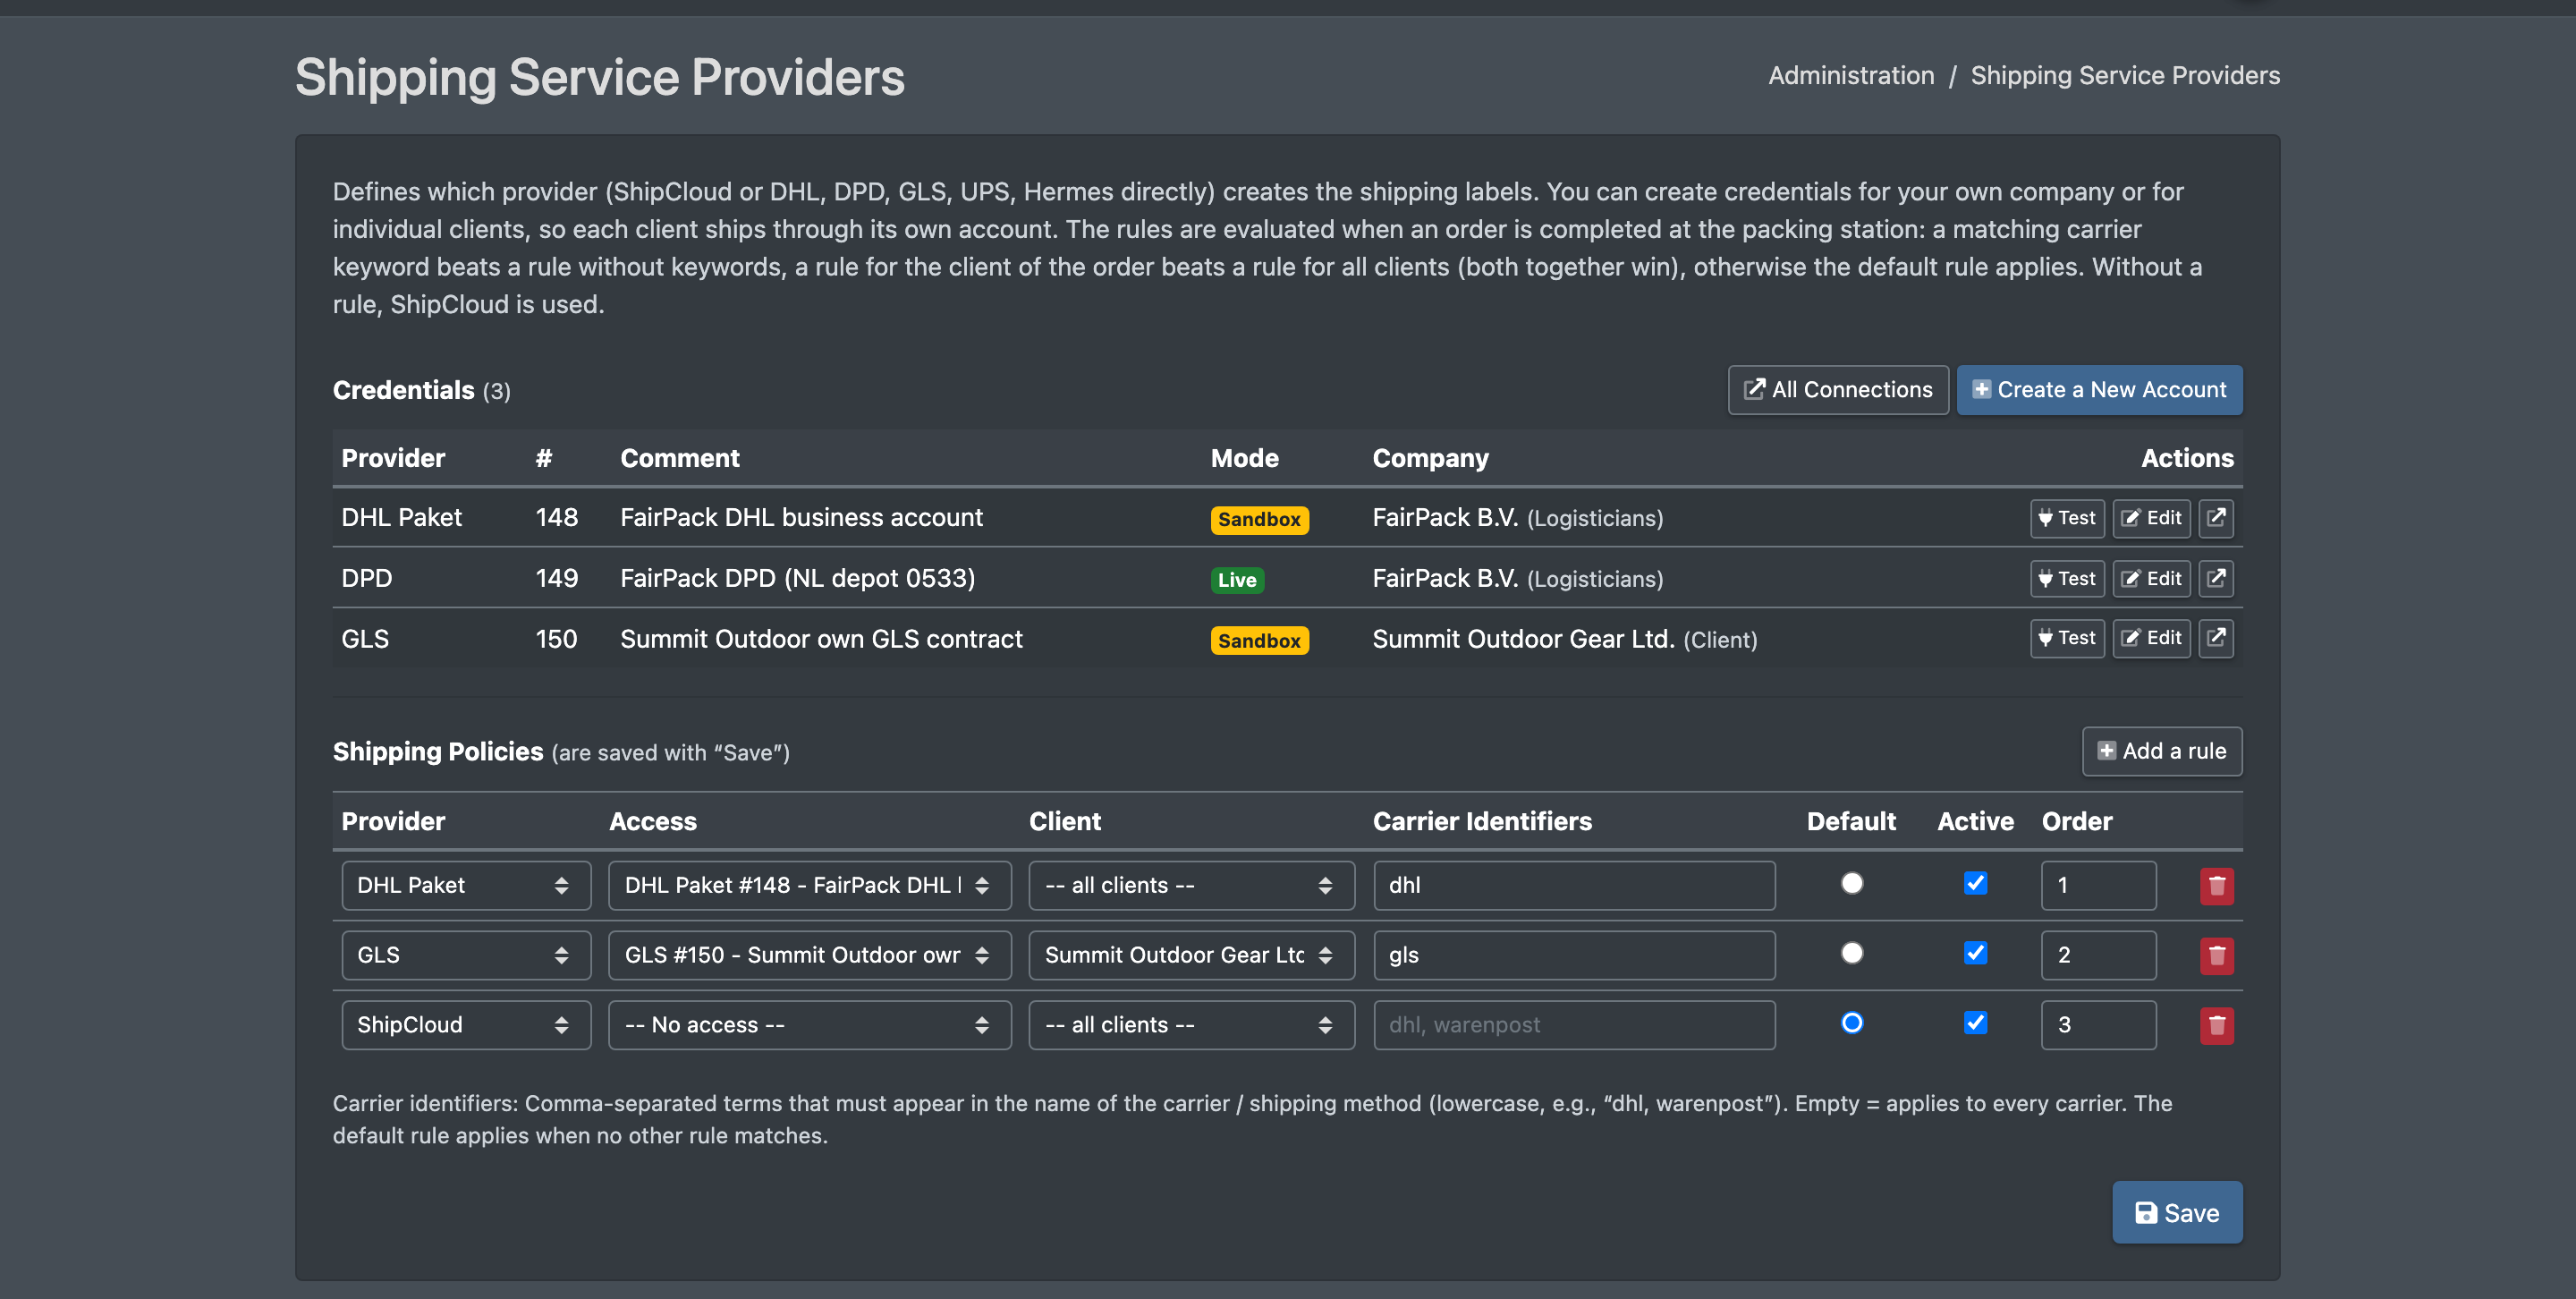
1. Create a carrier account
- Open Administration › Shipping providers (Administration › Versanddienstleister).
- In the Accounts card (Zugänge), click Create a new account (Neuen Zugang anlegen).
- Choose the Provider (Anbieter).
- Choose the Company (Firma) the account belongs to: your own company (Logistiker) or a client (Mandant).
- Enter a Comment (Bemerkung), e.g. "Main account" or "Client XY".
- Fill in the access data of the provider. Fields marked with * are required.
- Optionally click Test access (Zugang testen) to check the login at the provider.
- Click Save account (Zugang speichern). You see "Account has been saved."
Provider and company cannot be changed after the account has been created. To change the access data later, click Edit (Bearbeiten) in the account row. Test (Testen) checks an existing account at any time.
2. Define shipping rules
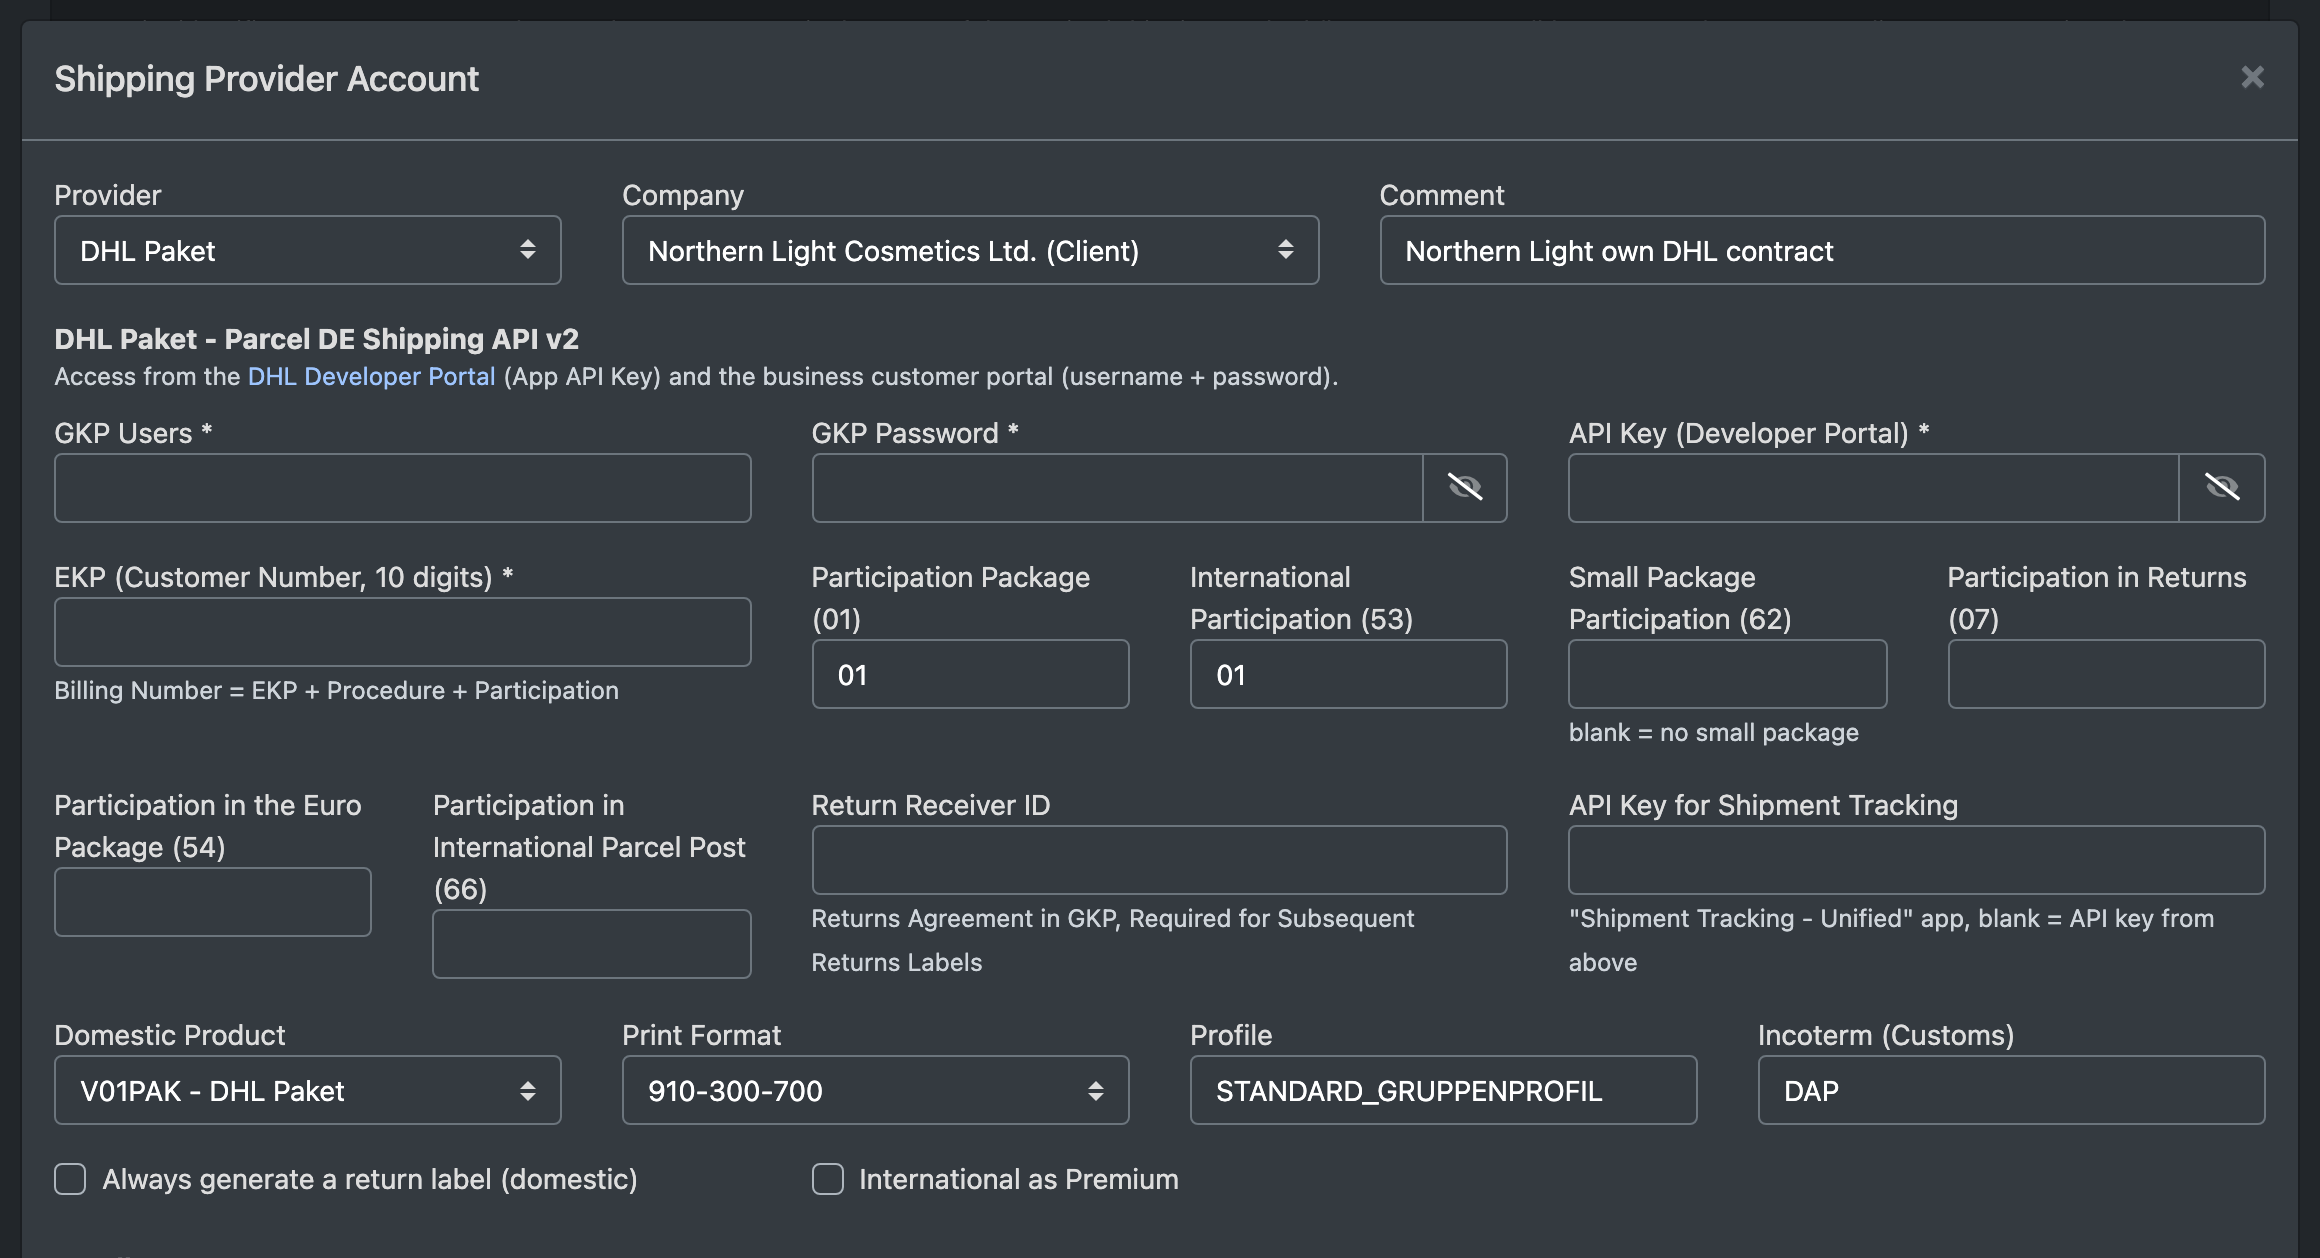
- In the Shipping rules card (Versand-Regeln), click Add a rule (Regel hinzufügen).
- Choose the Provider.
- Choose the Account (Zugang). Accounts of clients show the client name in brackets; leave it at "-- No access --" for ShipCloud.
- Choose the Client (Mandant): "-- all clients --" or a single client.
- Optionally enter Carrier identifiers (Frachtführer-Kennungen).
- Tick Default (Standard) for exactly one rule that should apply when no other rule fits.
- Tick Active (Aktiv) and set the Order (Reihenf.).
- Repeat for further rules. Remove rule (Regel entfernen) deletes a row.
- Click Save (Speichern). Rules are only stored with this button: "The shipping rules have been saved".
How a rule is chosen
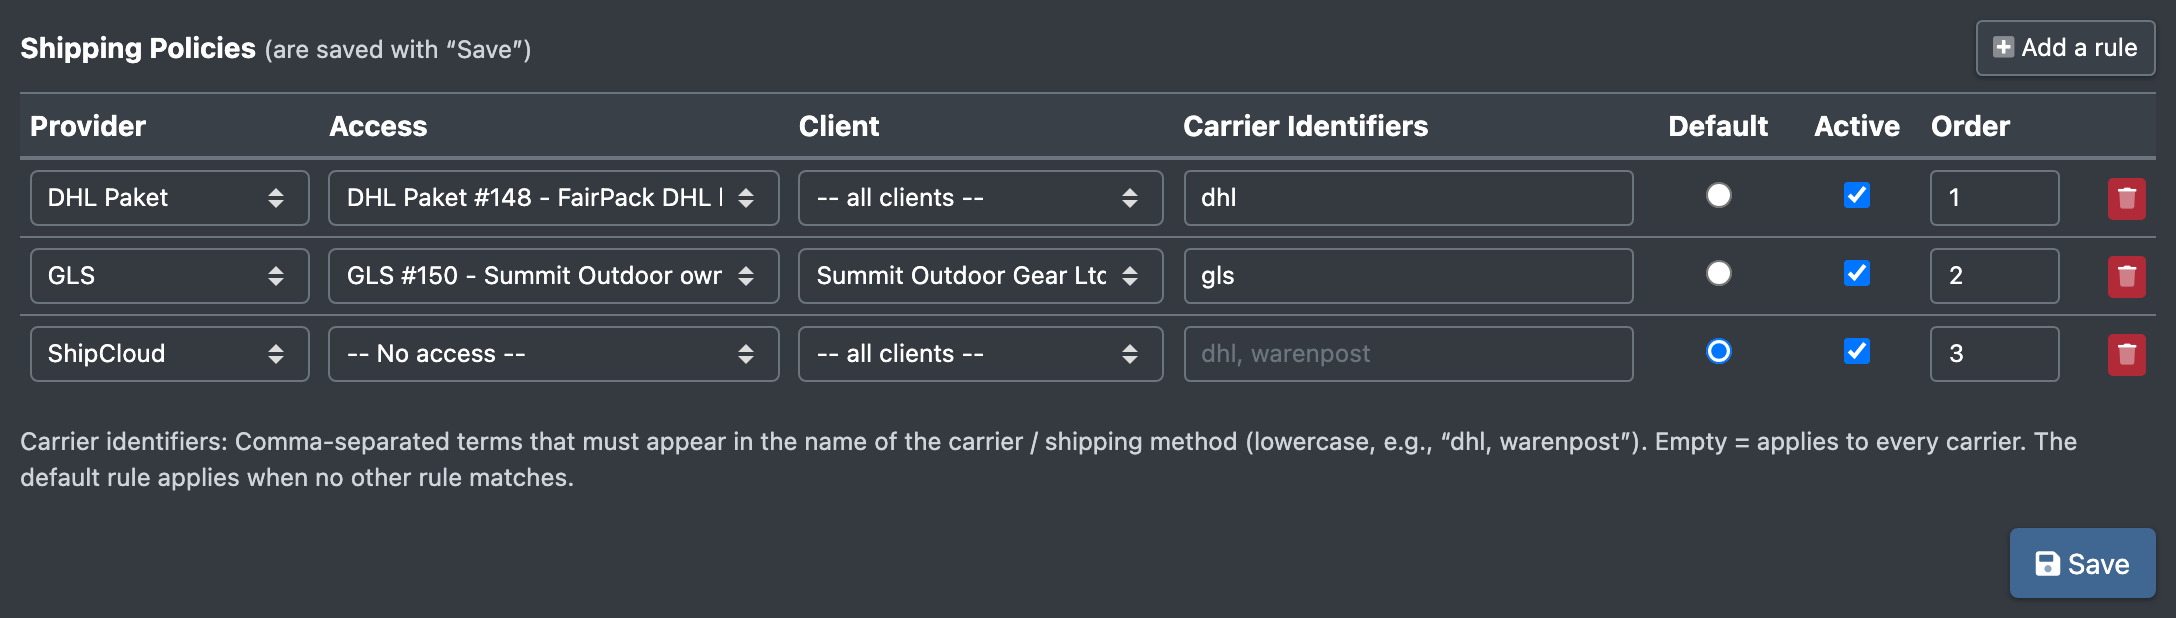
When a parcel is completed, X-Sitter takes the carrier name: the carrier chosen at the packing station, or – with "order shipping method" – the shipping method of the order. Then:
- Rules for another client or with carrier identifiers that do not appear in the carrier name are skipped.
- A rule whose carrier identifier matches wins over a rule without identifier.
- A rule for the order's client wins over a rule for all clients. A rule that matches both wins.
- If no rule fits, the Default rule is used.
- Without any rule, the label is created through ShipCloud.
Example: Rule A: DHL, all clients, identifiers "dhl, warenpost". Rule B: GLS, client "Shop Miller". Rule C: ShipCloud, default. An order of Shop Miller with carrier "DHL Warenpost" fits A (identifier) and B (client). A matching identifier counts more than a matching client, so rule A is used. If Shop Miller should ship DHL through its own account, add rule D: DHL, client Shop Miller, identifier "dhl", with Shop Miller's DHL account – it matches both and wins. An order of another client with carrier "Hermes" fits neither A nor B, so the default rule C applies.
Fields and options
Shipping rules
Required access data per provider
Every account has a Mode (Modus): sandbox (test system) or live.

Shipments to non-EU countries
For recipients outside the EU, X-Sitter sends the customs data automatically (price of the order item, weight, customs tariff number and country of origin from the article; without country of origin DE is used).
- ShipCloud and DHL return a CN23 customs form, UPS a commercial invoice. The document is printed together with the label at the packing station and saved in the order under Documents (see Order documents).
- GLS sends customs data only if the customs declaration option is enabled in the account.
- DPD and Hermes do not support non-EU shipments in X-Sitter – use another provider for these.
Make sure your articles have a customs tariff number and country of origin.
Good to know / Troubleshooting
All Connections (Alle Verbindungen) opens Jobs & connections, where all accounts appear as connections (only with the matching permission). Tracking of direct-API labels is updated automatically, see Shipment tracking and Shipping labels.