Storage areas
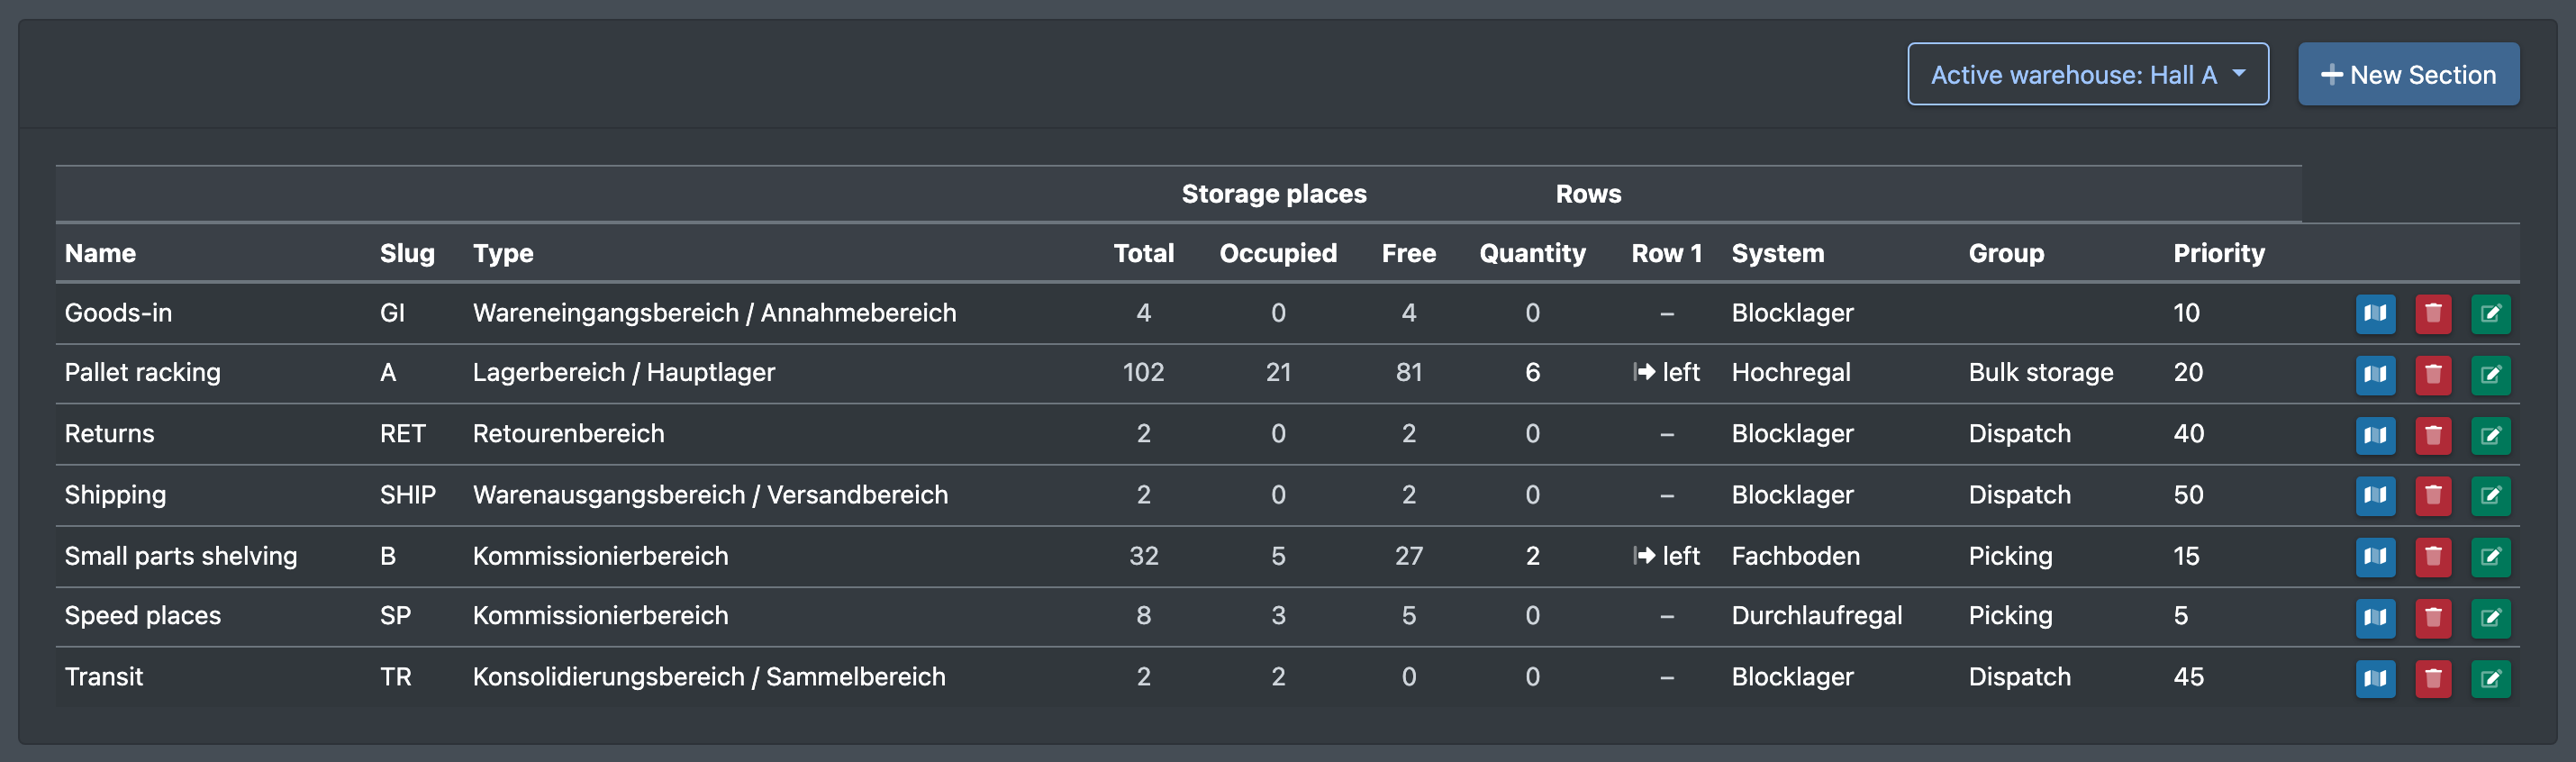
A storage area groups the storage places of a warehouse by purpose, for example high-bay racking, picking area or goods receipt. During putaway your staff only choose the area – the system automatically looks for a free place in it. The short code of the area is put in front of every place number.
You can also store row data per area. It is used for the hall plan, for inventories and for route optimization when picking.
Before you start
- A warehouse exists and is selected as the current warehouse – see Warehouses.
- Your user needs the permission Storage areas (Lagerbereiche) and, depending on the task, create, edit or delete – ask your administrator.
- Optional: a storage group and packing tables if you want to anchor rows to a packing table.
Create a storage area
- Open WMS › Warehouse › Storage areas (WMS › Lager › Lagerbereiche).
- Click New area (Neuer Bereich).
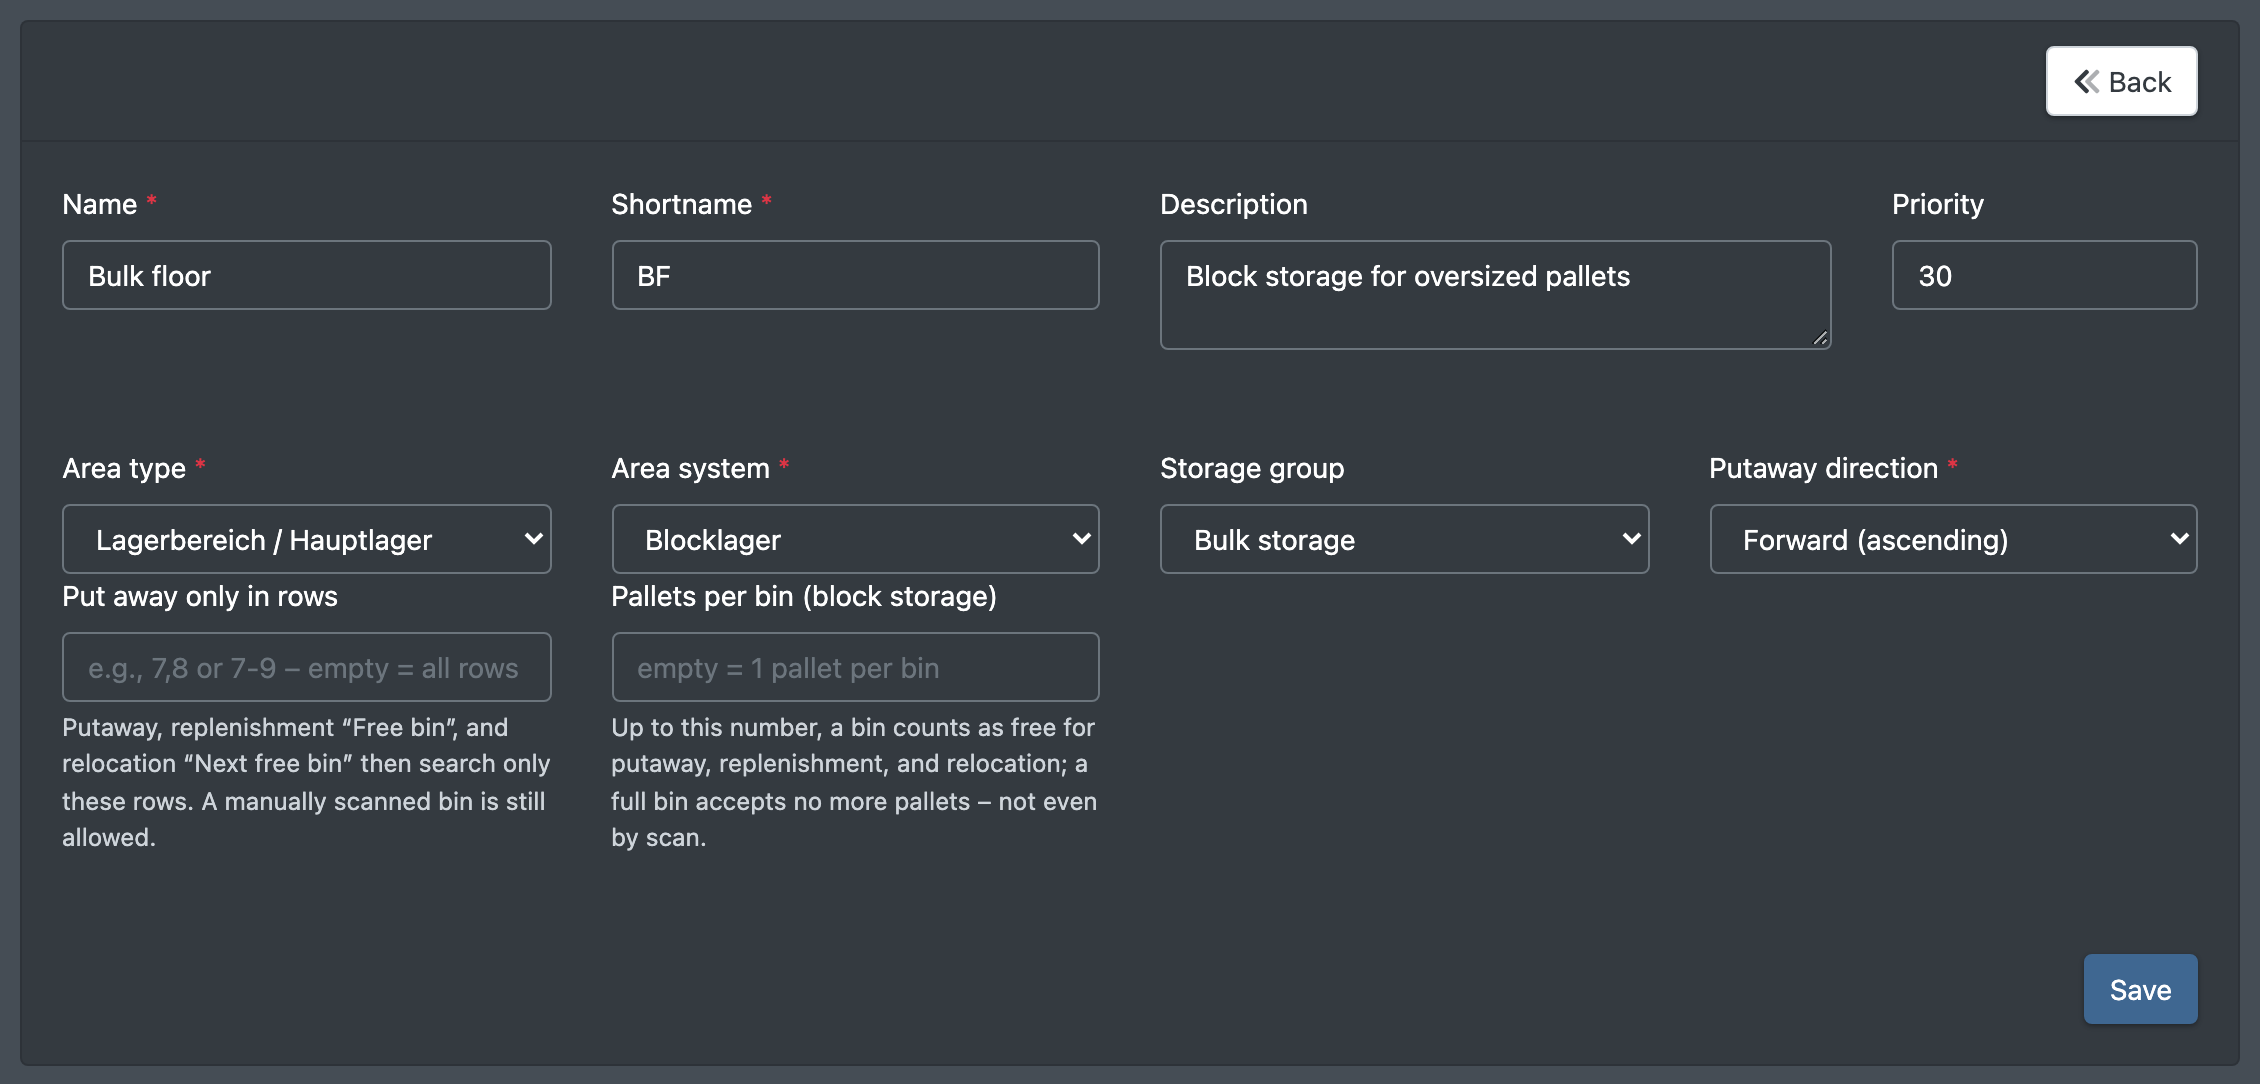
- Fill in Name (Name), Short code (Kürzel), Description (Beschreibung), Priority (Priorität), Area type (Bereichstyp), Area system (Bereichssystem), Storage group (Lagergruppe) and Putaway direction (Einlagerungs-Richtung).
- Click Save (Speichern). You see "Storage area was created" (Lagerbereich wurde angelegt).
- Now create the places of the area – see Storage places. Each place number is saved as
<short code>-<number>.
Fields and options
Additional options when editing
When you edit an existing area, you get more options.
Assign to all places in this area (Allen Plätzen in diesem Bereich zuweisen) Writes Storage place type, Storage place kind and Loading unit to all places of the area at once. "-- unchanged --" (-- unverändert --) leaves the places as they are, "– remove –" (– entfernen –) clears the value. You see "%s places of the area updated (%s)."

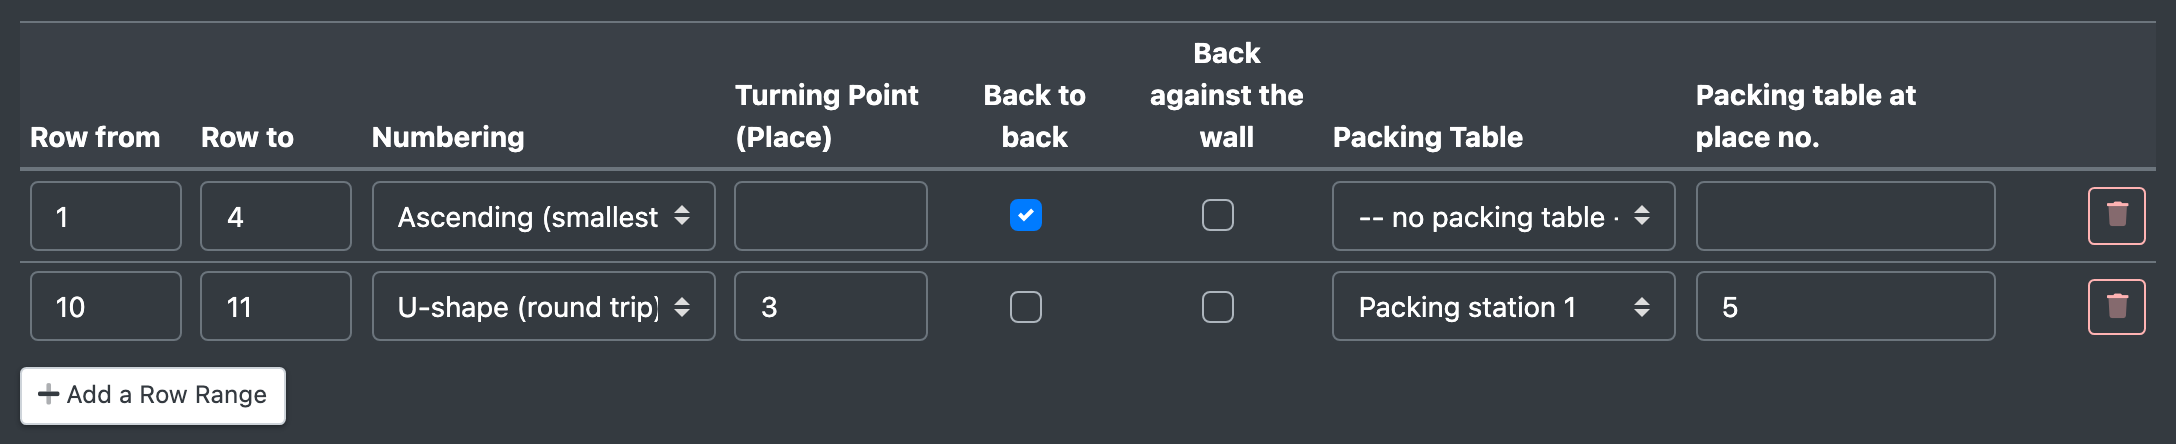
Rows (Reihen) Add row ranges with Add row range (Reihen-Bereich hinzufügen). Per entry:
- Row from / Row to (Reihe von / Reihe bis) – for a single row enter the same value twice, e.g. "from 12 to 12".
- Numbering (Nummerierung): Ascending (smallest place at the front), Descending (largest place at the front) or U-shape (U-Form (hin und zurück)) with a Turning point (place) (Wendepunkt (Platz)) – the last place before the row turns.
- Back to back (Rücken an Rücken) – the rows stand in pairs without an aisle between them.
- Against the back wall (Hinten an der Wand) – there is no passage behind the rows; the pick route then uses the front cross aisle.
- Packing table (Packtisch) and Packing table at place no. (Packtisch bei Platz-Nr.) – where a packing table stands in the row.
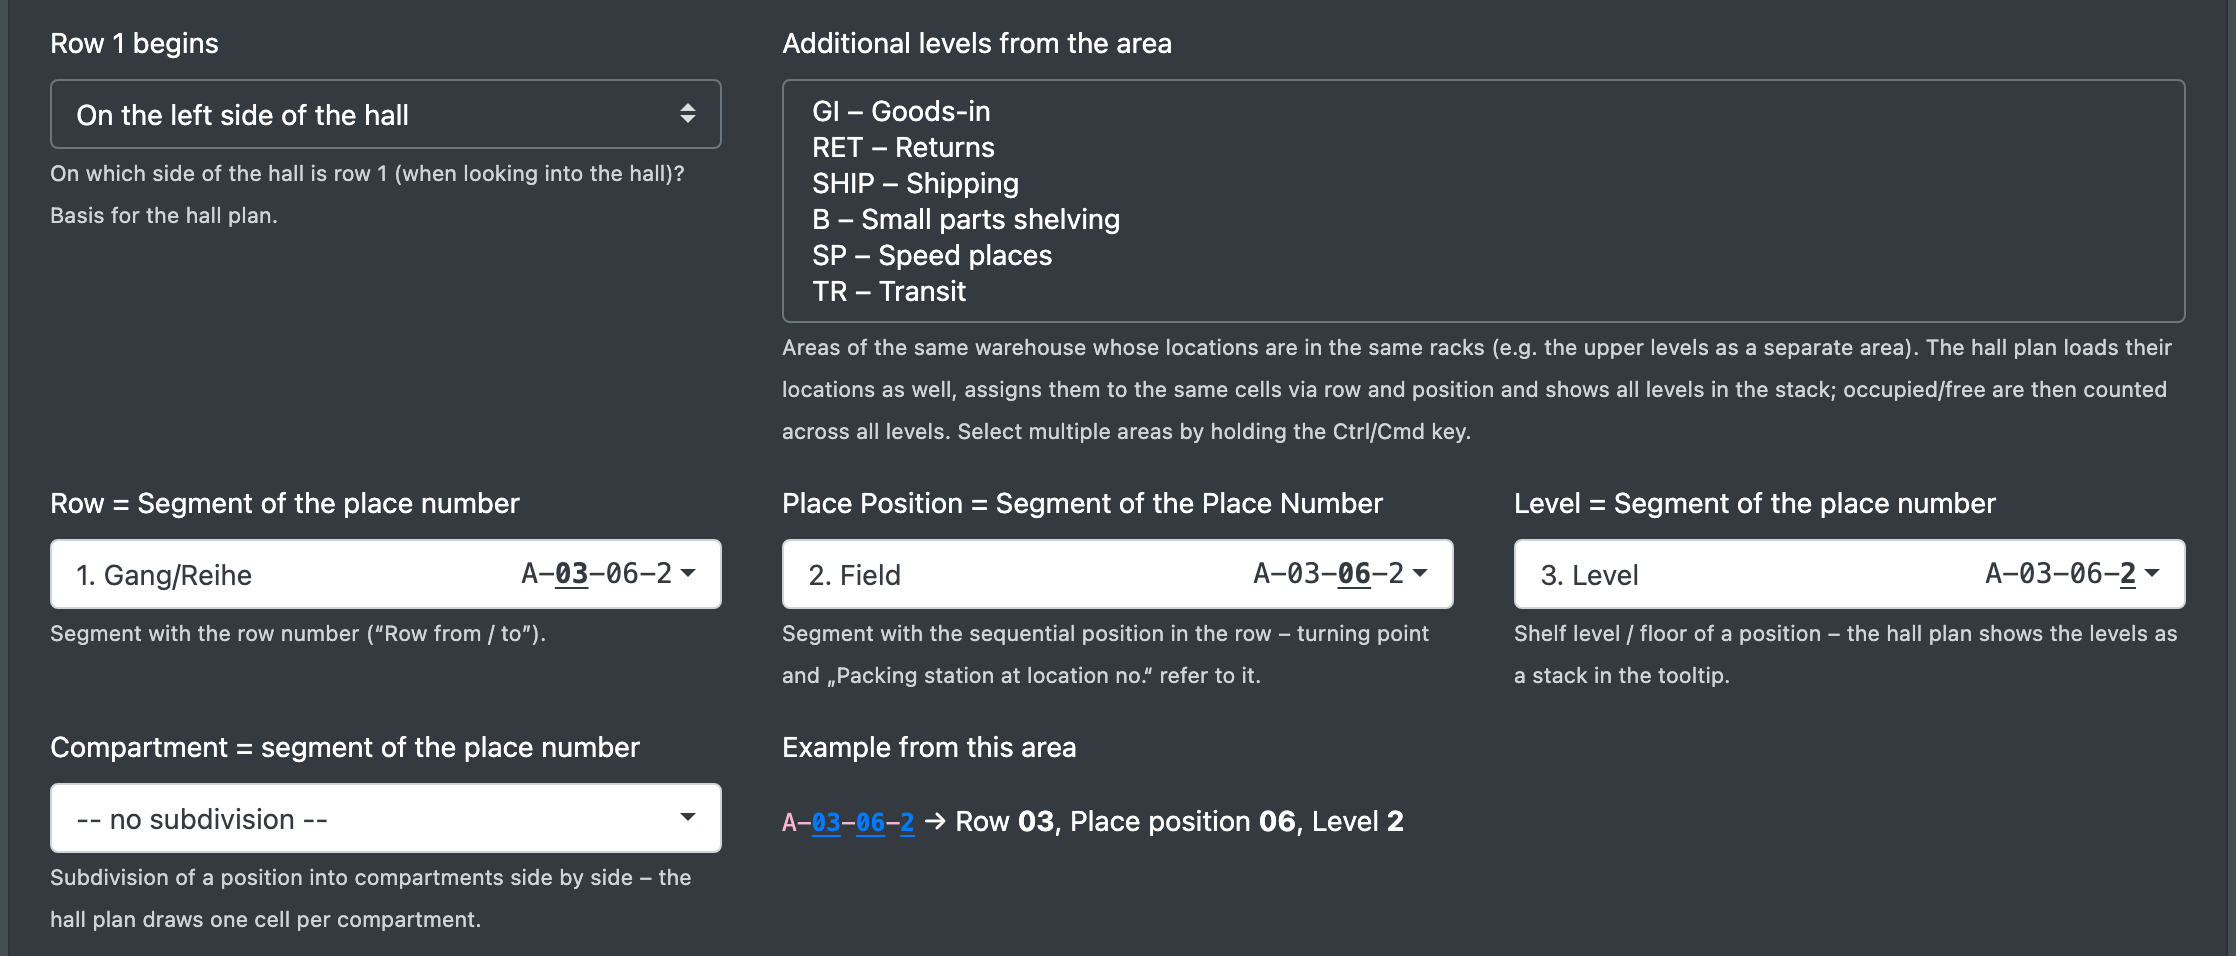
Segment assignment Tell the system which segment of the place number contains what – counted without the area short code:
- Row = segment of the place number (Reihe = Segment der Platz-Nummer)
- Place position = segment … (Platz-Position = Segment …) – the running position within the row
- Level = segment … (Ebene = Segment …) or "-- no levels --"
- Compartment = segment … (Fach = Segment …) or "-- no subdivision --"
Example from the screen: the place "RD-12-05-4-2" has the segments 12 | 05 | 4 | 2. With row = 1st segment and place position = 2nd segment it lies in row 12 at position 5.
Row 1 starts (Reihe 1 beginnt): Left in the hall or Right in the hall (looking into the hall). This is the basis for the hall plan.
Further levels from area (Weitere Ebenen aus Bereich): areas of the same warehouse whose places stand in the same racks (for example the upper levels as a separate area). The hall plan then shows all levels as a stack.
Hall plan
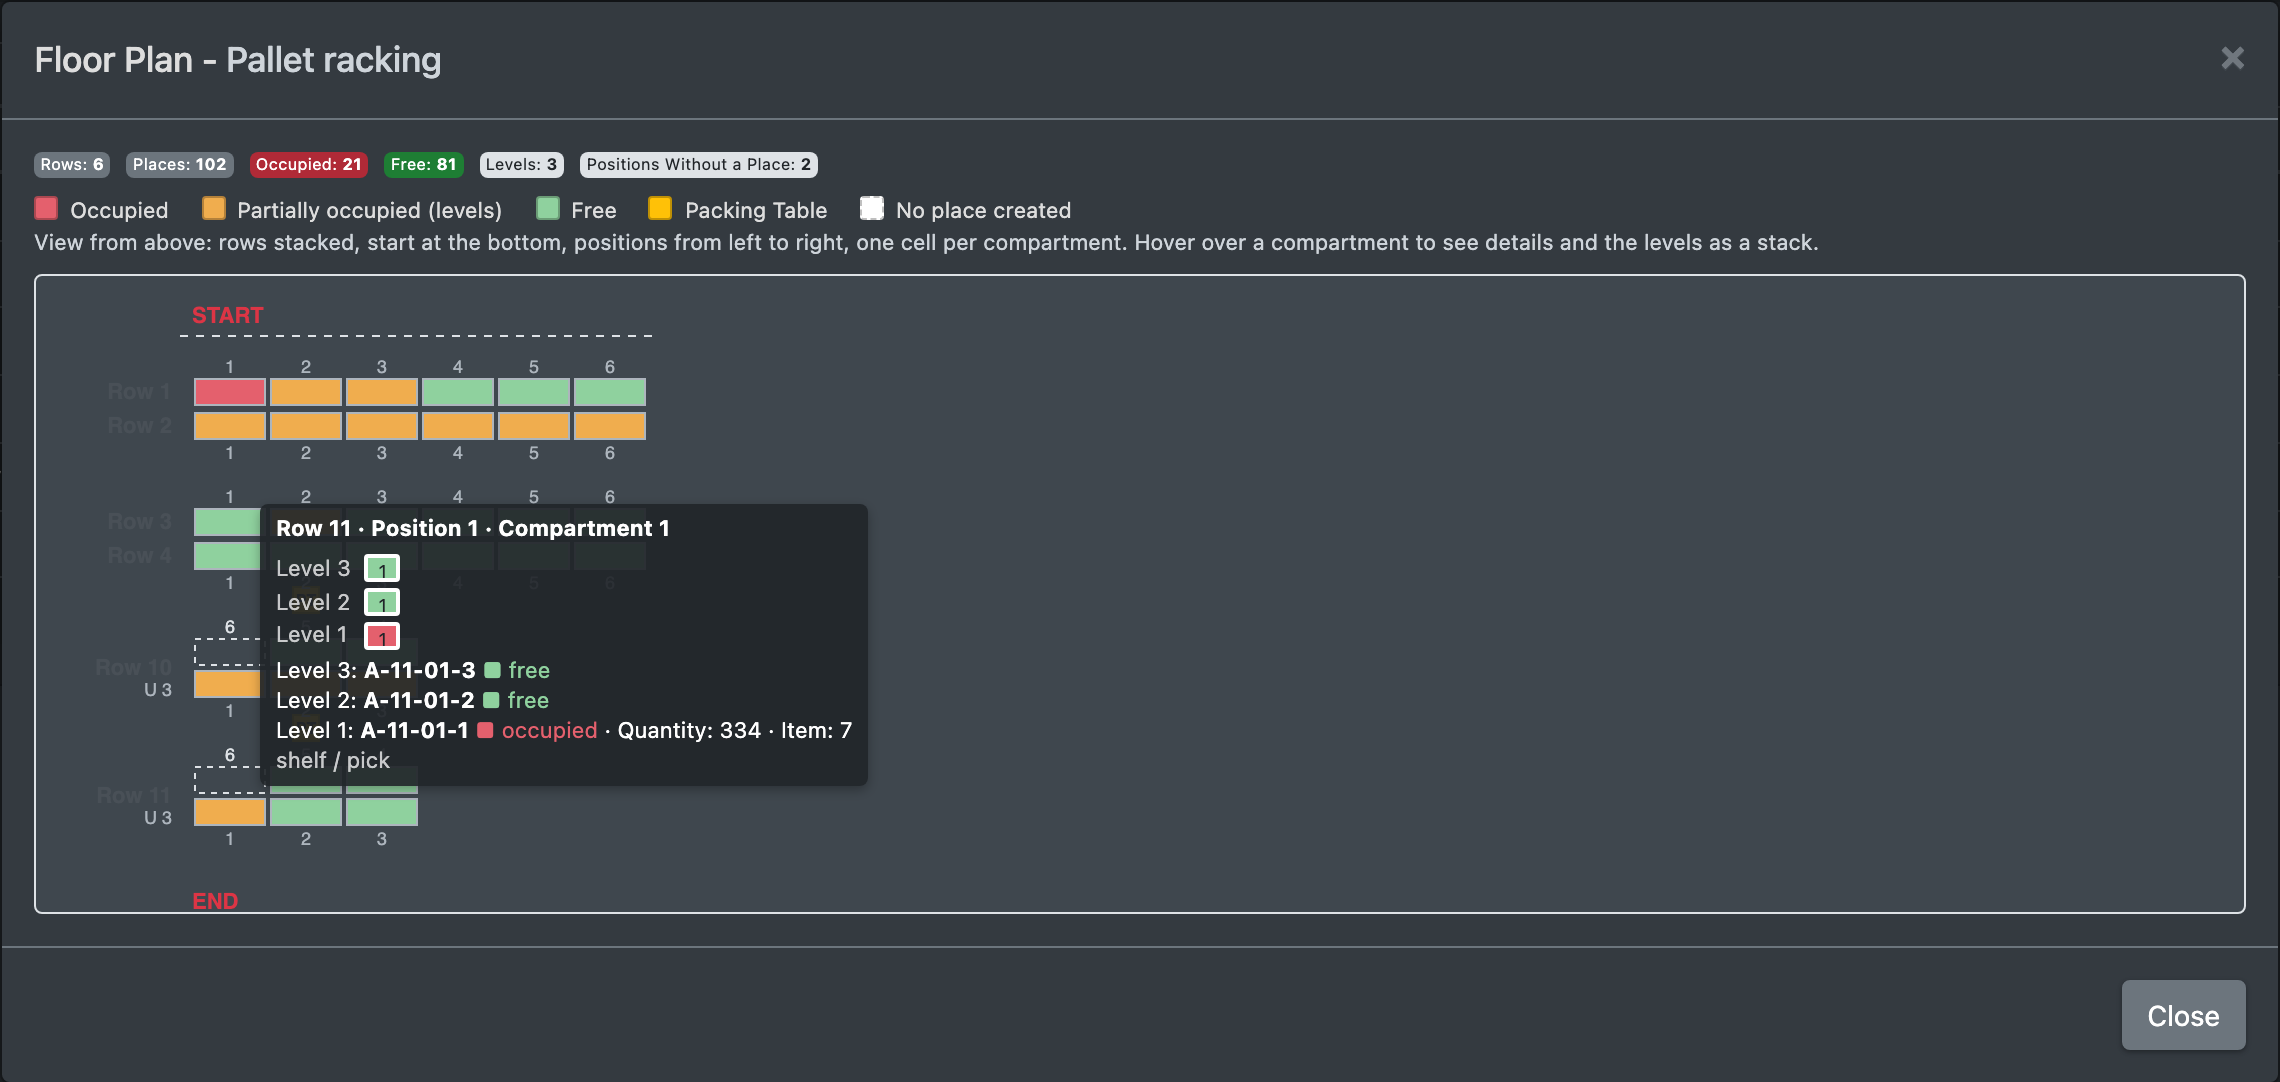
Click Show hall plan (Hallenplan anzeigen) in the list. You see a top view of the area: rows on top of each other, start at the bottom, positions from left to right, one cell per compartment. Colours show occupied, partly occupied (levels) and free. Hover over a compartment to see the details and the levels as a stack.
How storage areas are used
- Putaway: the system searches for a free place only in the chosen area, in the order of the putaway direction. The area is prefilled from the article attribute for the storage area or from the client's default storage area – see Putaway and Clients.
- Relocation: target suggestions per area; the area whose rows are anchored at your current packing table is preselected – see Relocation.
- Employee assignment filters by areas or groups – see Employee assignment.
- Picking: the row data is used for the pick routes – see Picking.
Delete a storage area
Click the delete button and confirm "Do you really want to delete this storage area?" (Möchtest du diesen Lagerbereich wirklich löschen?).
warning All places are deleted too
Deleting an area also deletes all storage places of this area.
Good to know / Troubleshooting
- Why does putaway always fill the highest place? The putaway direction is set to Reverse (descending).
- Empty row entries are ignored, swapped from/to values are corrected automatically, and a single value counts as from = to.