
Create or edit an order
You can create an order directly in X-Sitter, without a sales channel – for example for sample shipments, orders taken by phone or pallet deliveries. The same form is used to edit an existing order. A new order starts with status Open in the order overview and then runs through picking and shipping exactly like an imported order.
Before you start
- Your user needs the permission to create new orders. Some parts of the form need extra permissions: choosing the shipping method, dropship sender address, adding pallets, assigning an employee and the EMCS field. Ask your administrator if a field is missing.
- The client must exist. See Clients.
- The articles must exist for this client with the same SKU. Otherwise the line counts as an unknown article and cannot be picked. See Article overview.
- A warehouse must be set up. See Warehouses.
Step by step
1. Open the form
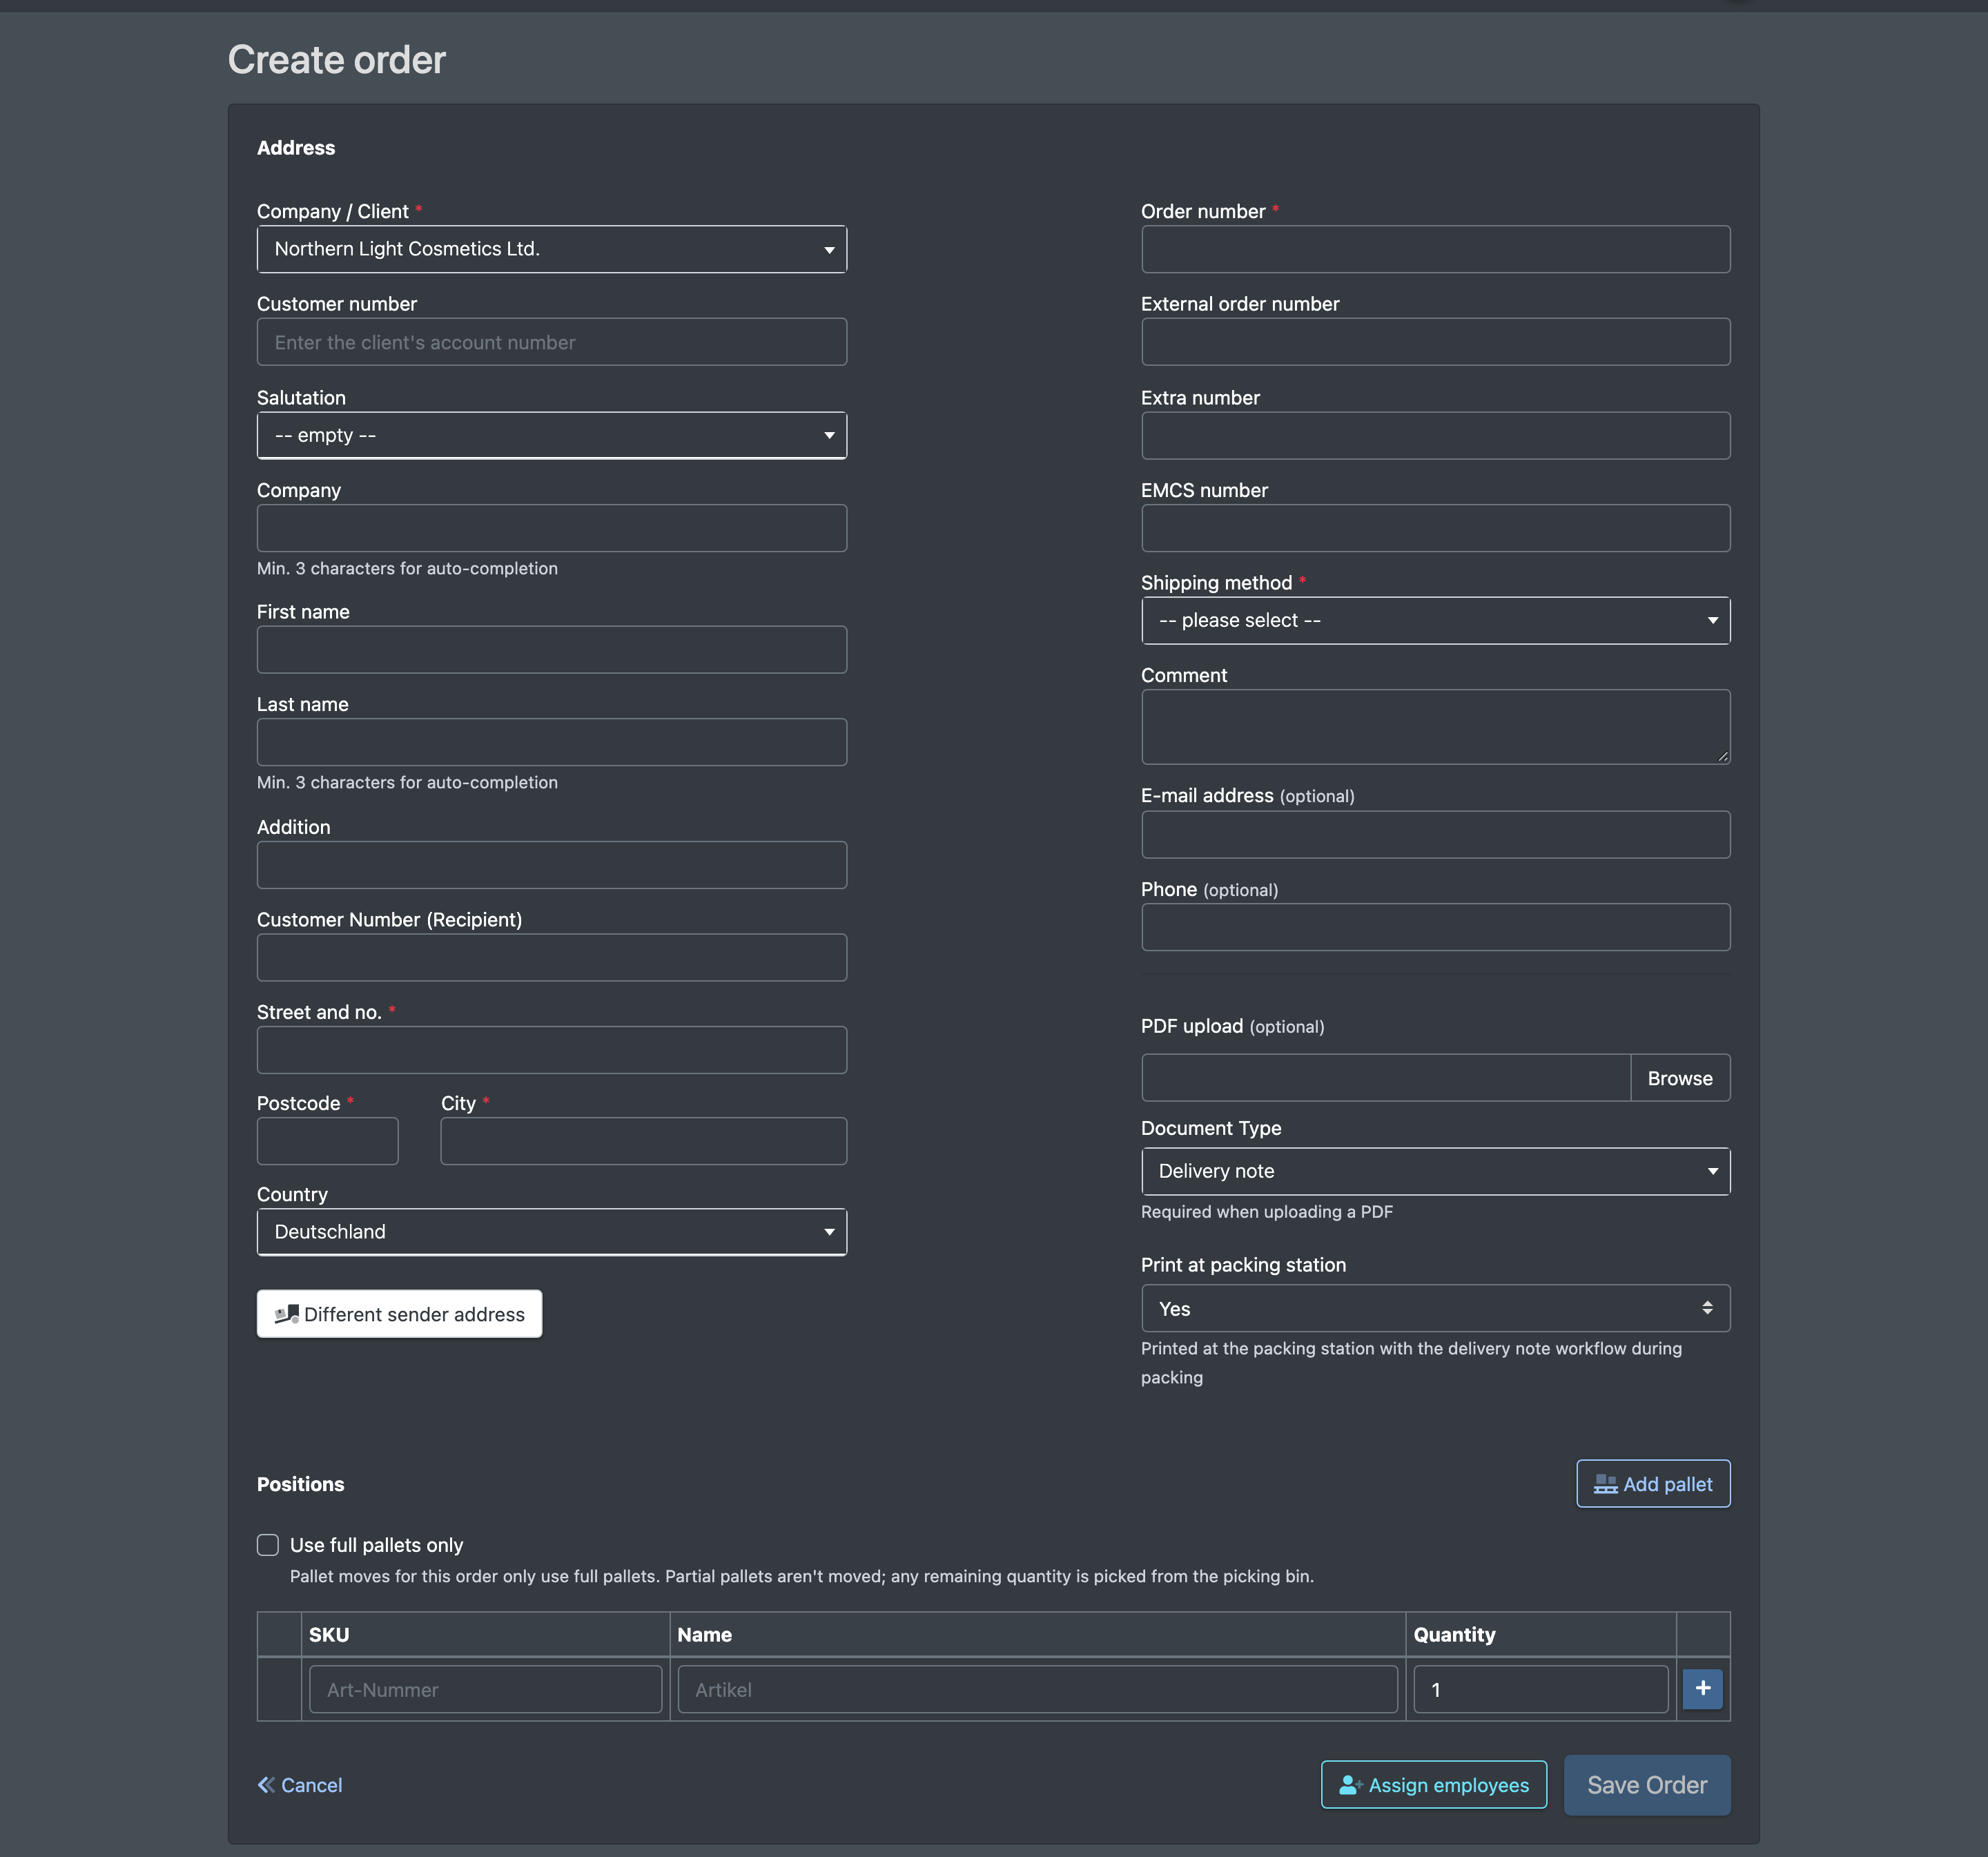
Open Orders › New order (Aufträge › Neuer Auftrag) or click New order in the order overview.
2. Address
- Choose the client in Company / Client (Firma / Mandant), or type the client's customer number into the field Enter the client's account number (Kundennummer des Mandanten eingeben).
- Enter the recipient: Salutation (Anrede), Company (Firma), First name (Vorname), Last name (Nachname), Addition (Zusatz), Customer Number (Recipient) (Kundennummer (Empfänger)), Street and no. (Straße und Nr.), Postcode (Plz), City (Stadt) and Country (Land). From 3 characters on, the name fields suggest earlier recipients (auto-completion).
- Optional: click Different sender address (Abweichende Absender-Adresse) to ship in the name of another sender. See Dropship sender addresses.
3. Order data and shipping
- Enter the Order number (Auftragsnummer). It is required; you get a warning if it already exists.
- Optional: external order number (Bestellnummer), extra number (Extra-Nummer) and EMCS number (EMCS Nummer).
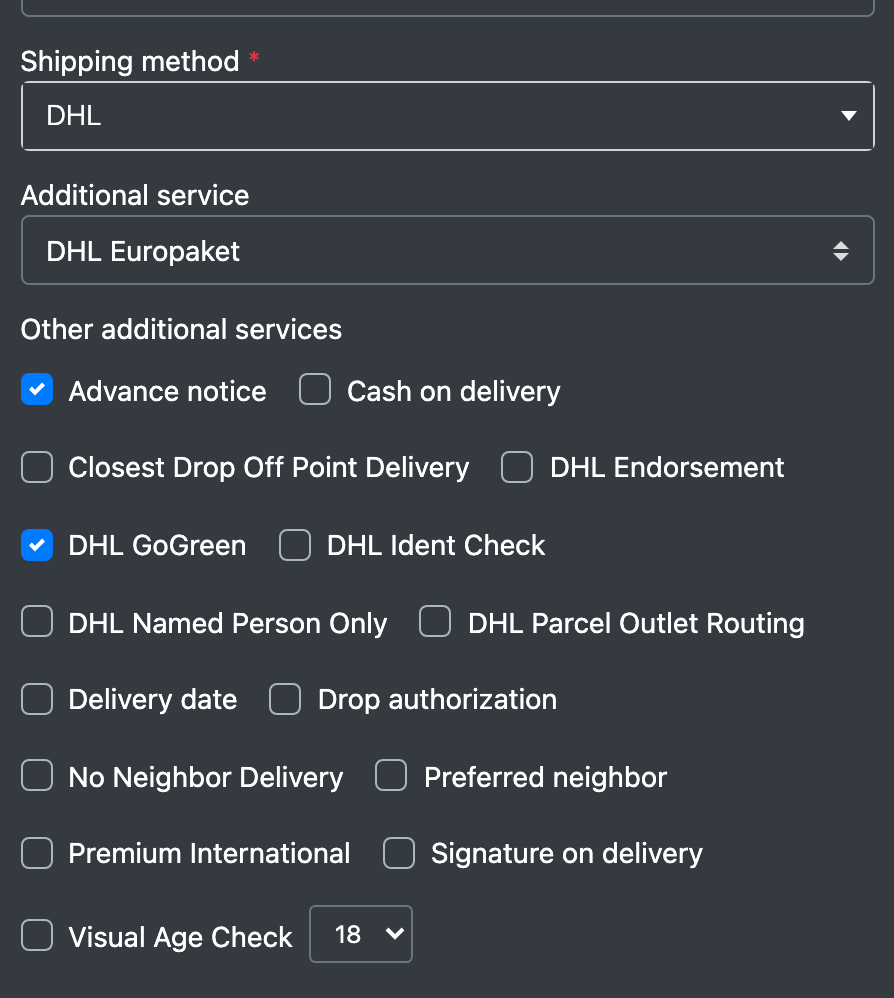
- Choose the Shipping method (Versandart): freight forwarder (Spedition), self-collection (Selbstabholer), DPD, DHL, UPS, GLS or Hermes.
- Depending on the carrier, choose an Additional service (Zusatzdienst, default standard) and Other additional services (Weitere Zusatzleistungen).
- Optional: Comment (Bemerkung), E-mail address (E-Mail Adresse) and Phone (Telefon) of the recipient.
4. Attach a PDF (optional)
- Choose a file in PDF upload (PDF Upload).
- Choose the Document Type (Dokument-Art): Delivery note (Lieferschein), Invoice (Rechnung), insert (Beileger) or EMCS Document (EMCS-Dokument). It is required when you upload a PDF.
- In Print at packing station (Am Packtisch drucken) choose whether the PDF is printed together with the delivery note workflow at the packing table.
See Order documents.
5. Positions
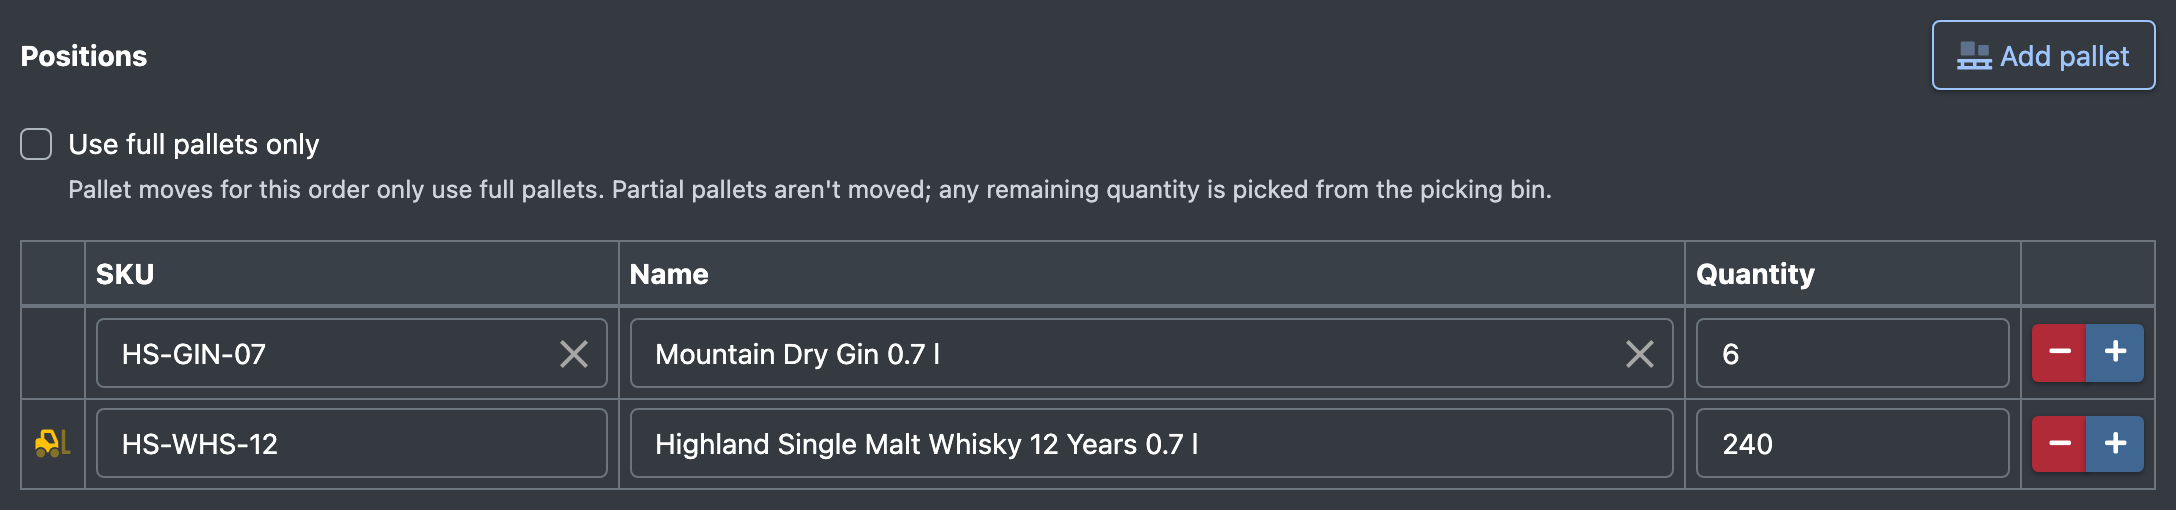
- Under Positions (Positionen) search for an article by SKU or name and enter the Quantity (Menge). Add as many lines as you need.
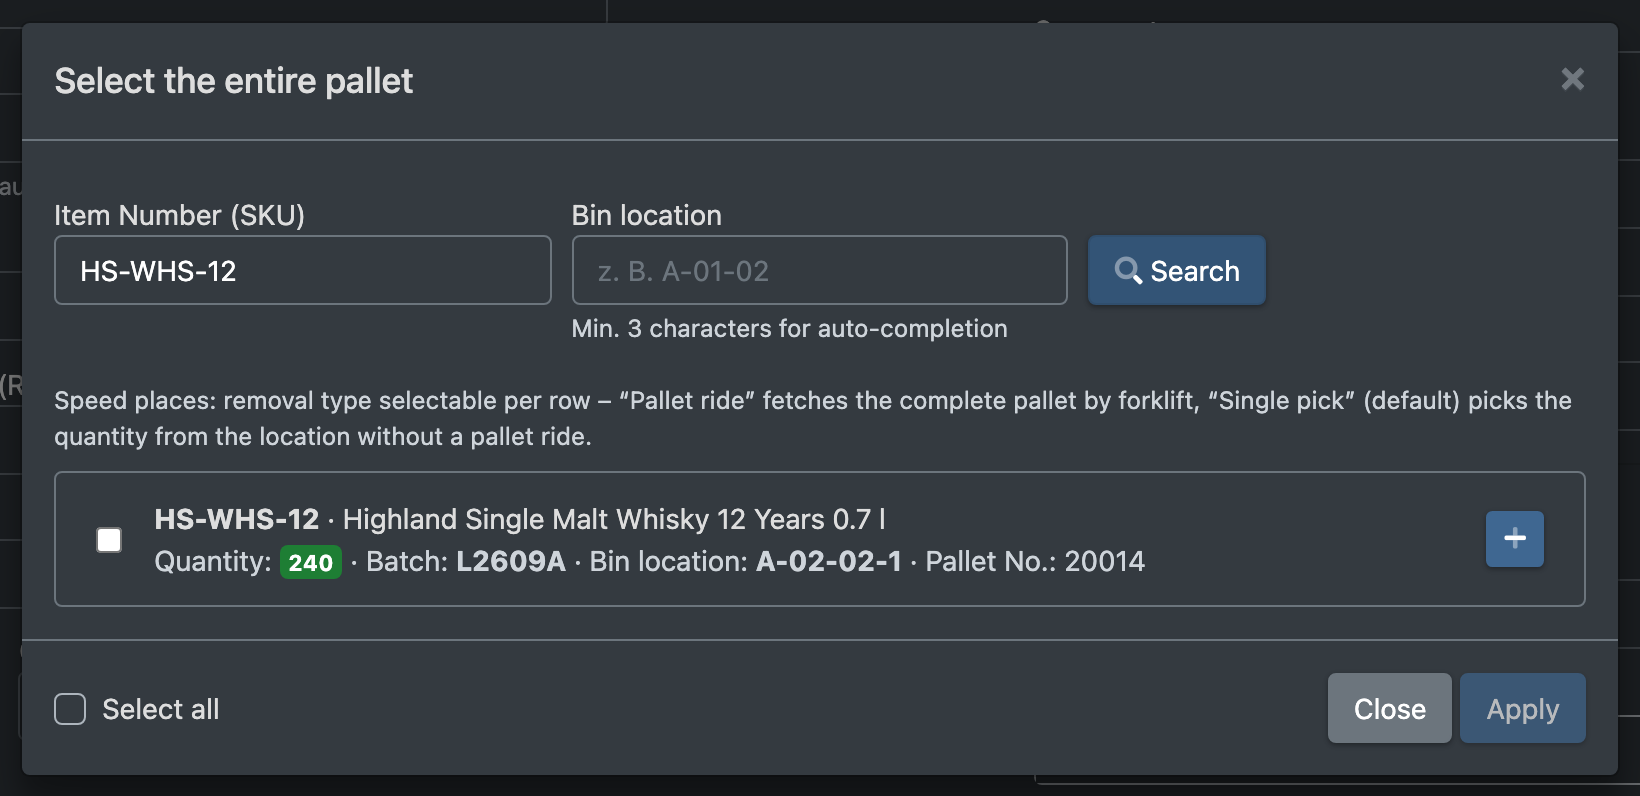
- To ship a pallet, click Add pallet (Palette hinzufügen). Choose Select available pallet (Verfügbare Palette auswählen) or Select the entire pallet (Komplette Palette auswählen).
- Each physical pallet (pallet label) appears as its own entry, even if several pallets of the same article stand on one storage place.
- For speed places you choose per line: Pallet Transport (Palettenfahrt) brings the complete pallet with a forklift, Single Pick (Einzelpick, default) picks the quantity from the place without a pallet ride.
- The forklift icon in front of the line is purple for a normal pallet ride and green when the pallet is in the transit warehouse – it can then be booked to the shipping station without a scan. See Transit warehouse and Pallet rides.
- Optional: tick Use full pallets only (Nur volle Paletten verwenden). Pallet rides for this order then only take full pallets; partial pallets are not moved and the rest is picked from the picking location.
6. Assign an employee (optional)
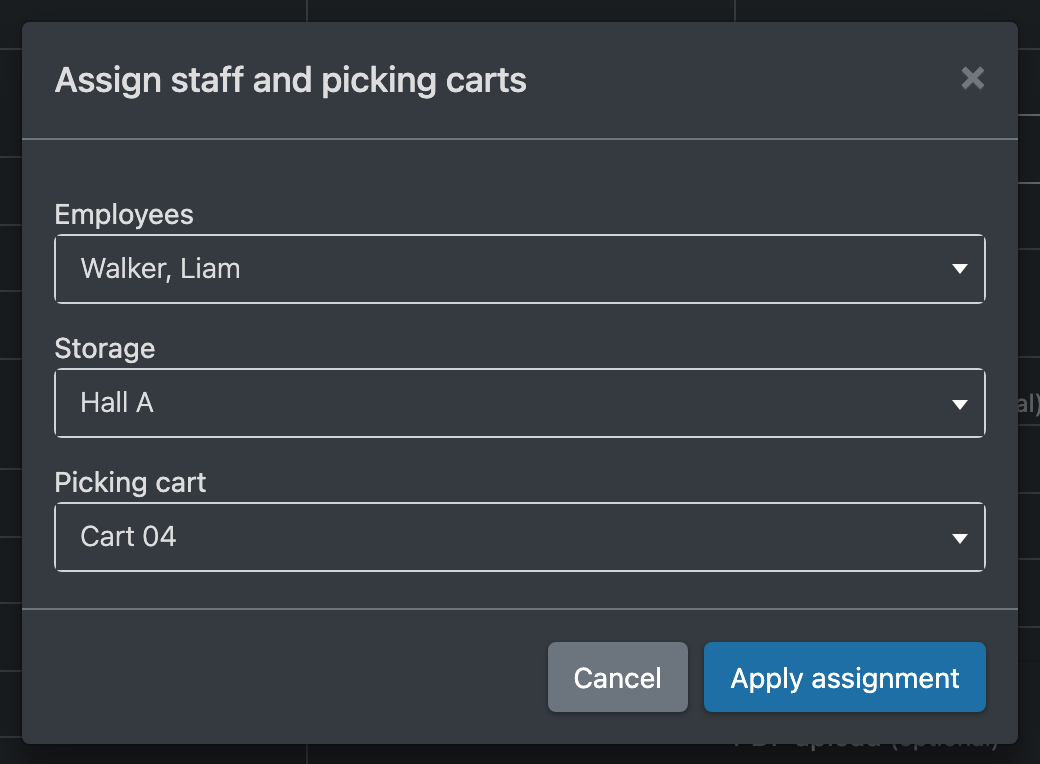
Click Assign employees (Mitarbeiter zuweisen) and choose an employee, a warehouse and a picking cart. Choose either both employee and picking cart, or neither. When you save, the picking cart is reserved for the employee and a pick list for this order is created right away.
7. Save
Click Save Order (Auftrag Speichern). You see The order has been created (Auftrag wurde angelegt). The import workflows of the order then start automatically (for example delivery note or e-mails, depending on your workflows).
Edit an existing order
- In the order overview or in the order details click the pencil button.
- Change the data and click Save Order. You see The order has been updated (Auftrag wurde ge-updated).
Orders in status Open, Error or in shipping can be fully edited. For all other statuses you see a hint that address, numbers, shipping options and documents can still be changed, but positions and client are locked.

Fields and options
Good to know / Troubleshooting
Pallet lines reserve the stock on the storage place as soon as the order is saved. If you remove the line, the reservation is released again.